Guide Steps
Two Ways to Create a New Loan/Project
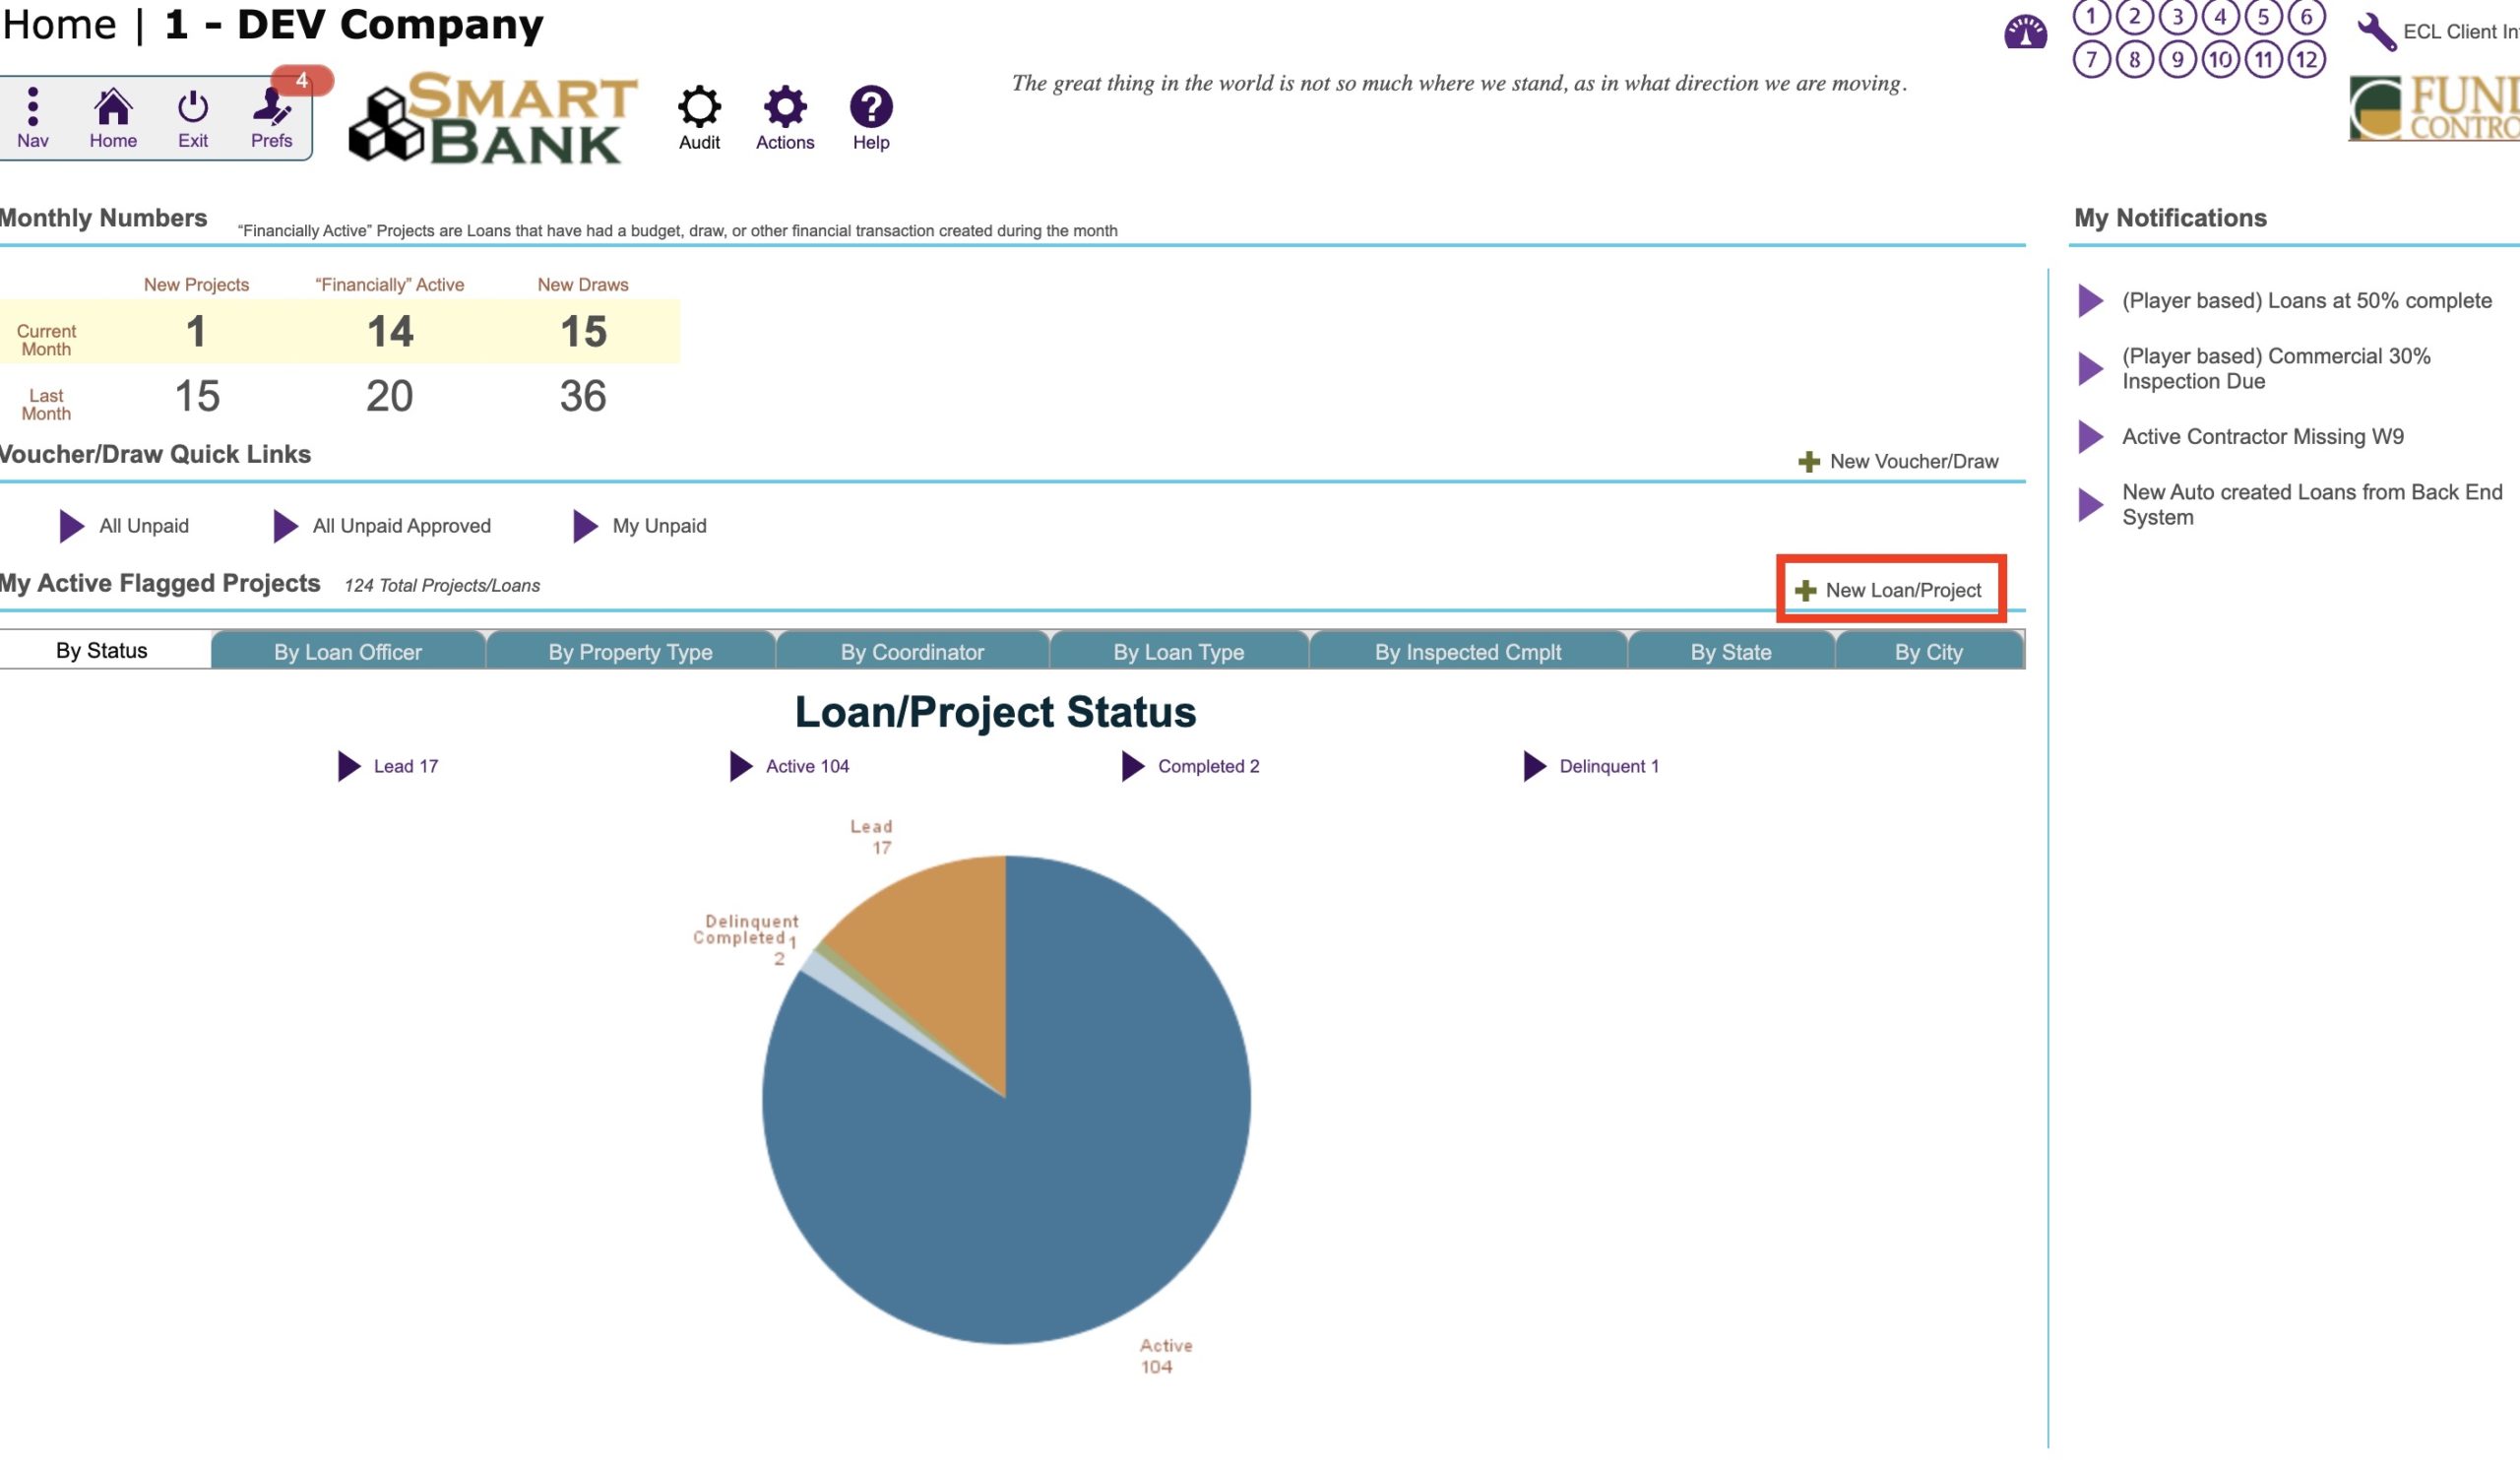
In the Home Screen click New Loan Project
Or Navigate to anywhere under Loans and click the New button.
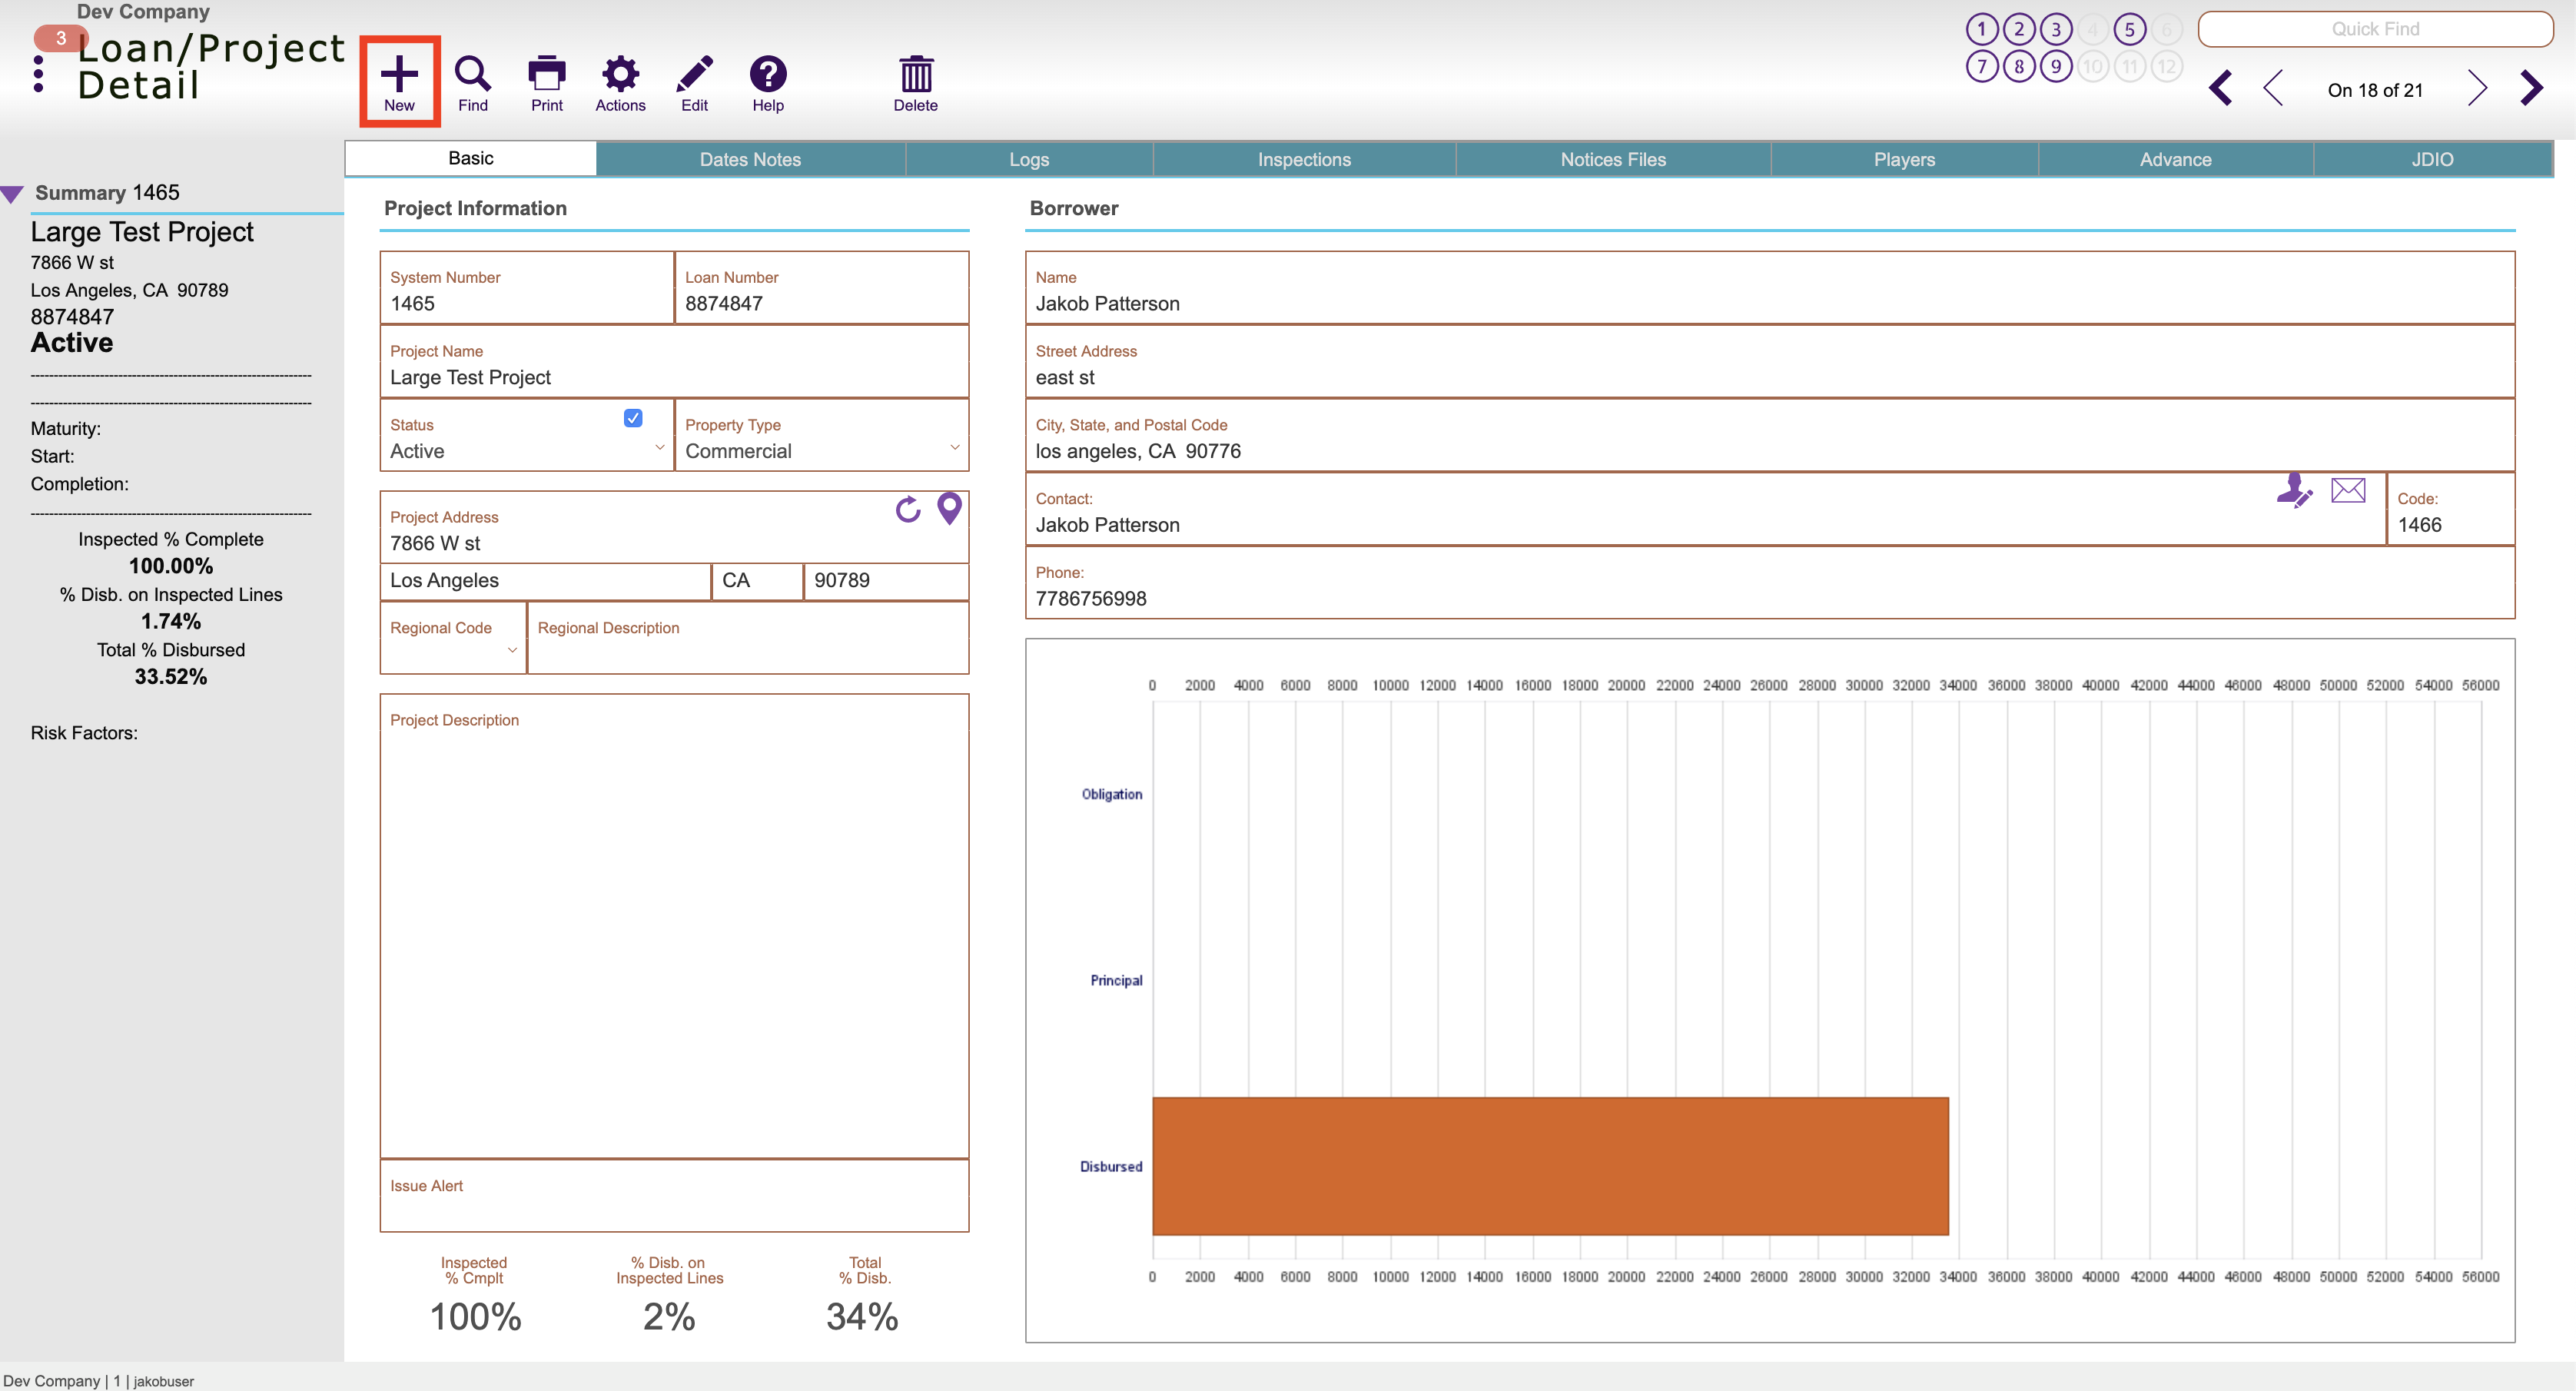
Fill out the Loan Number and then any other desired information in the fields. (Project Name, Status, Property type and address, etc.)
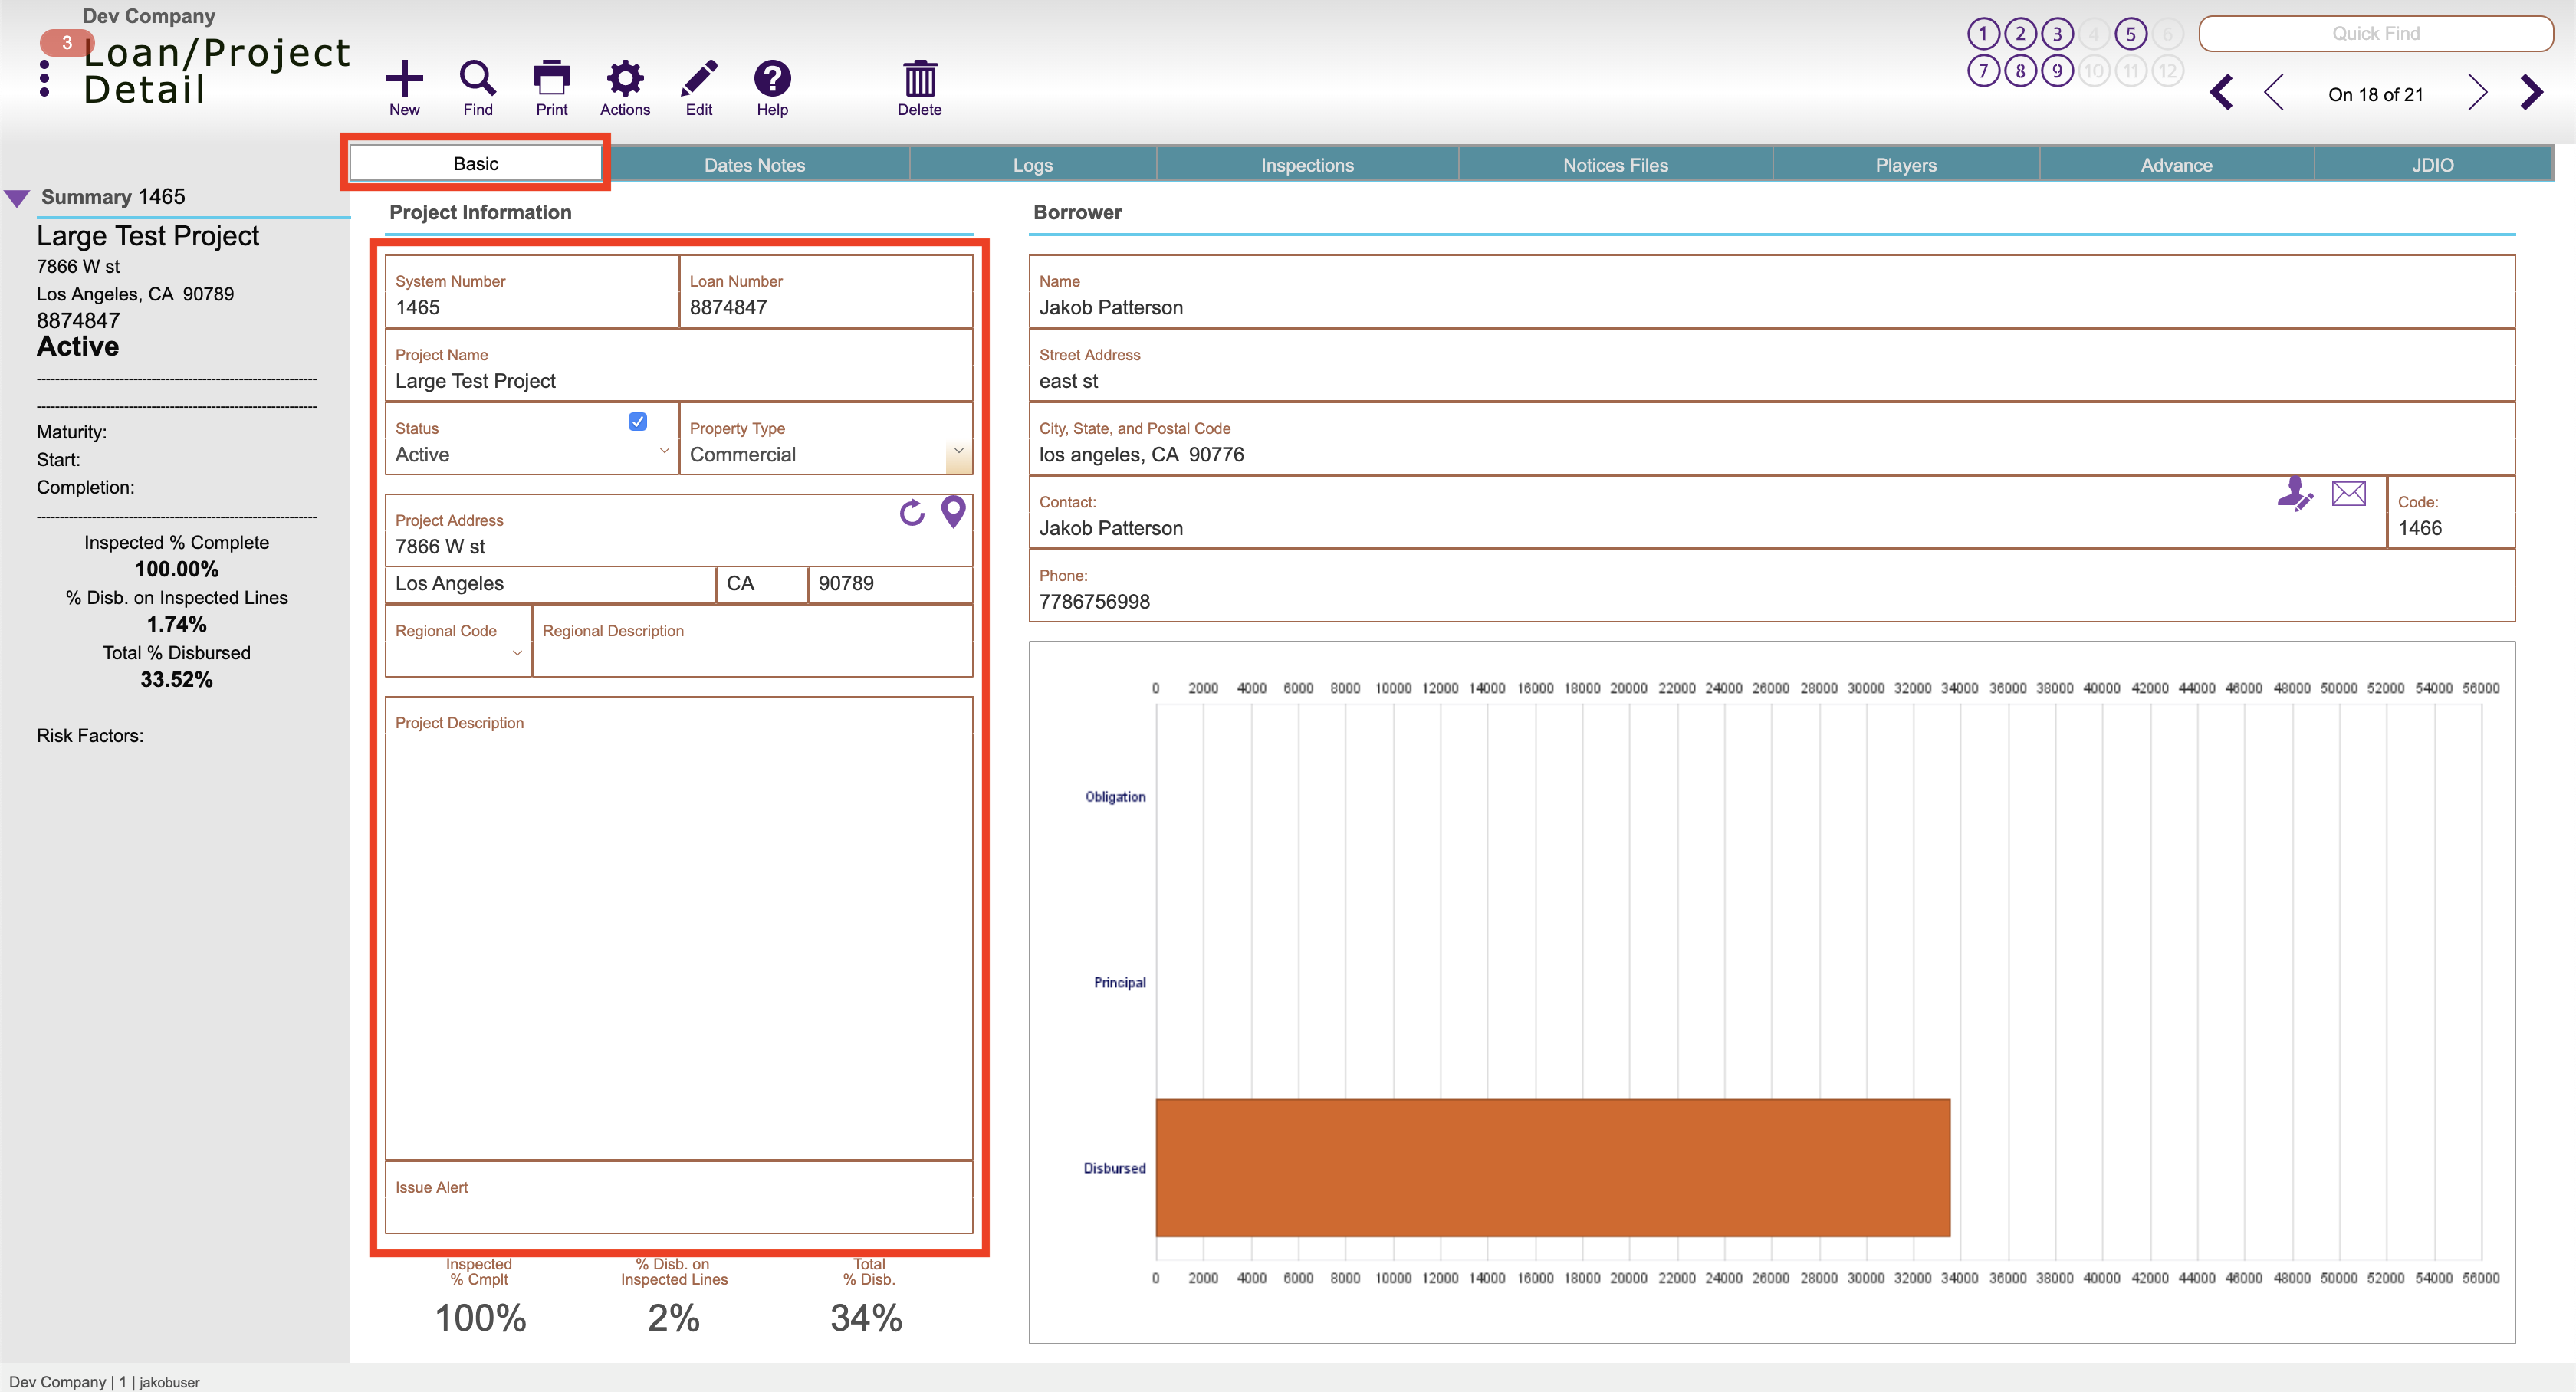
The other tabs are also areas where other information can be entered as well.
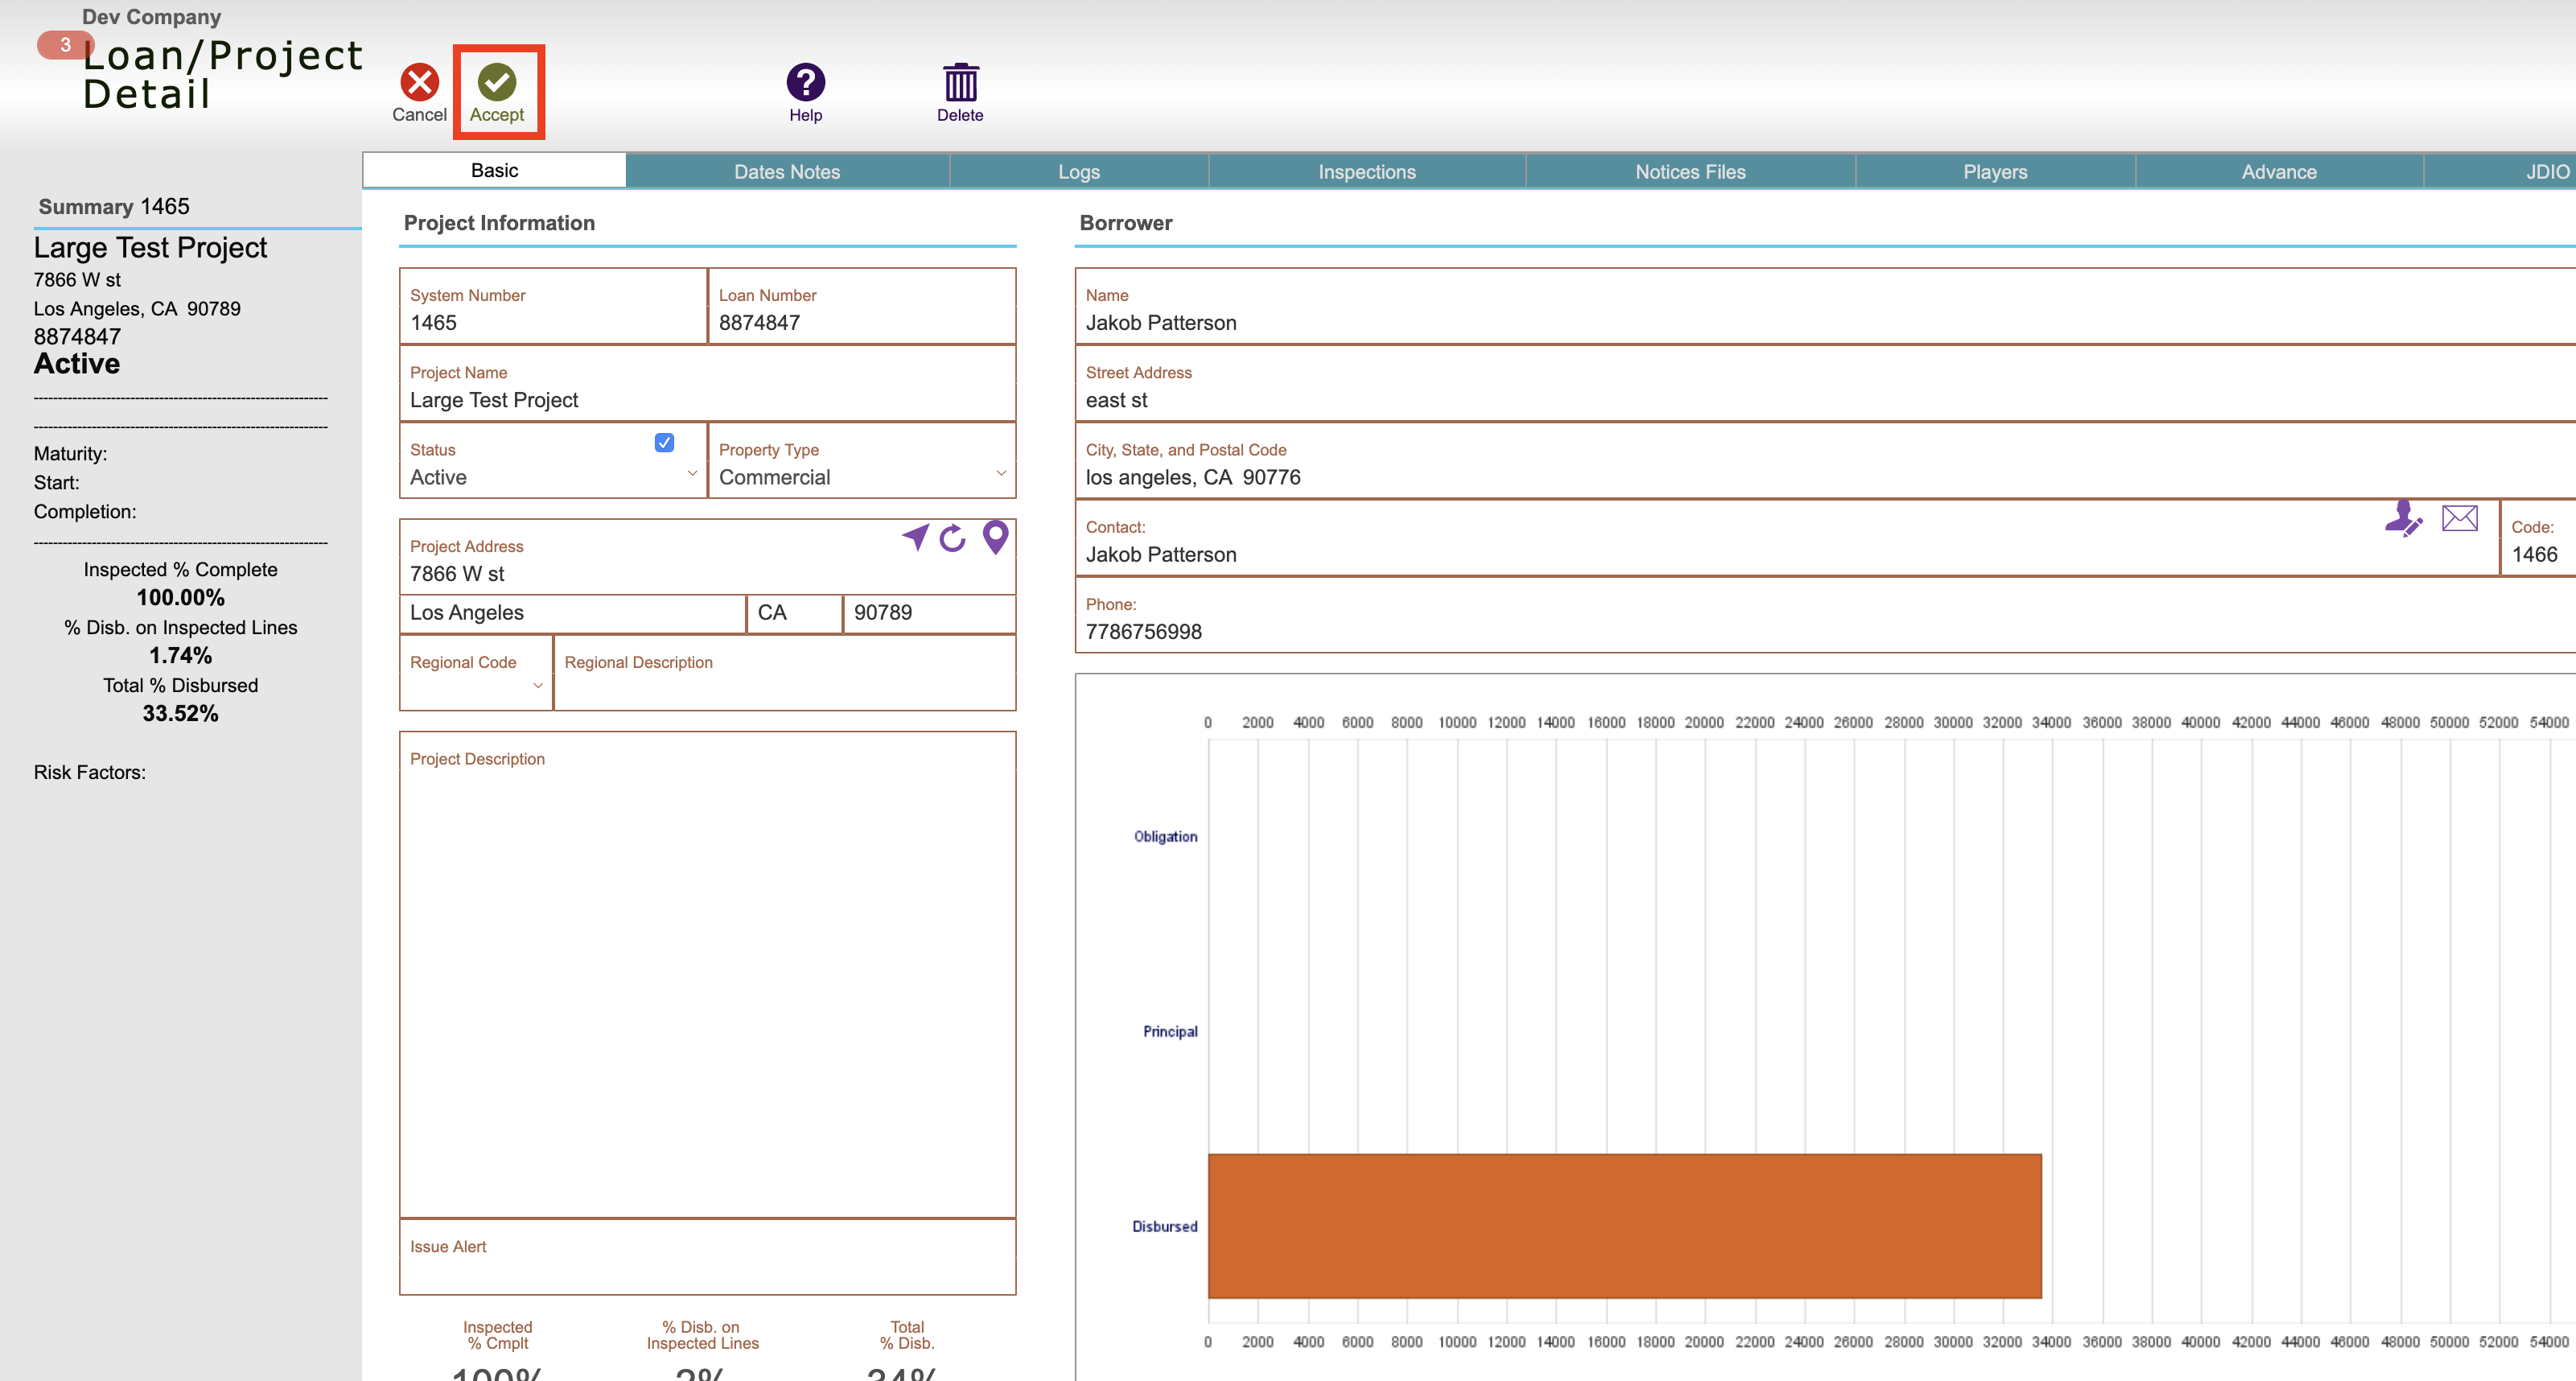
Basic tab: Loan name, number, project address, status, property type, issue alert, project description
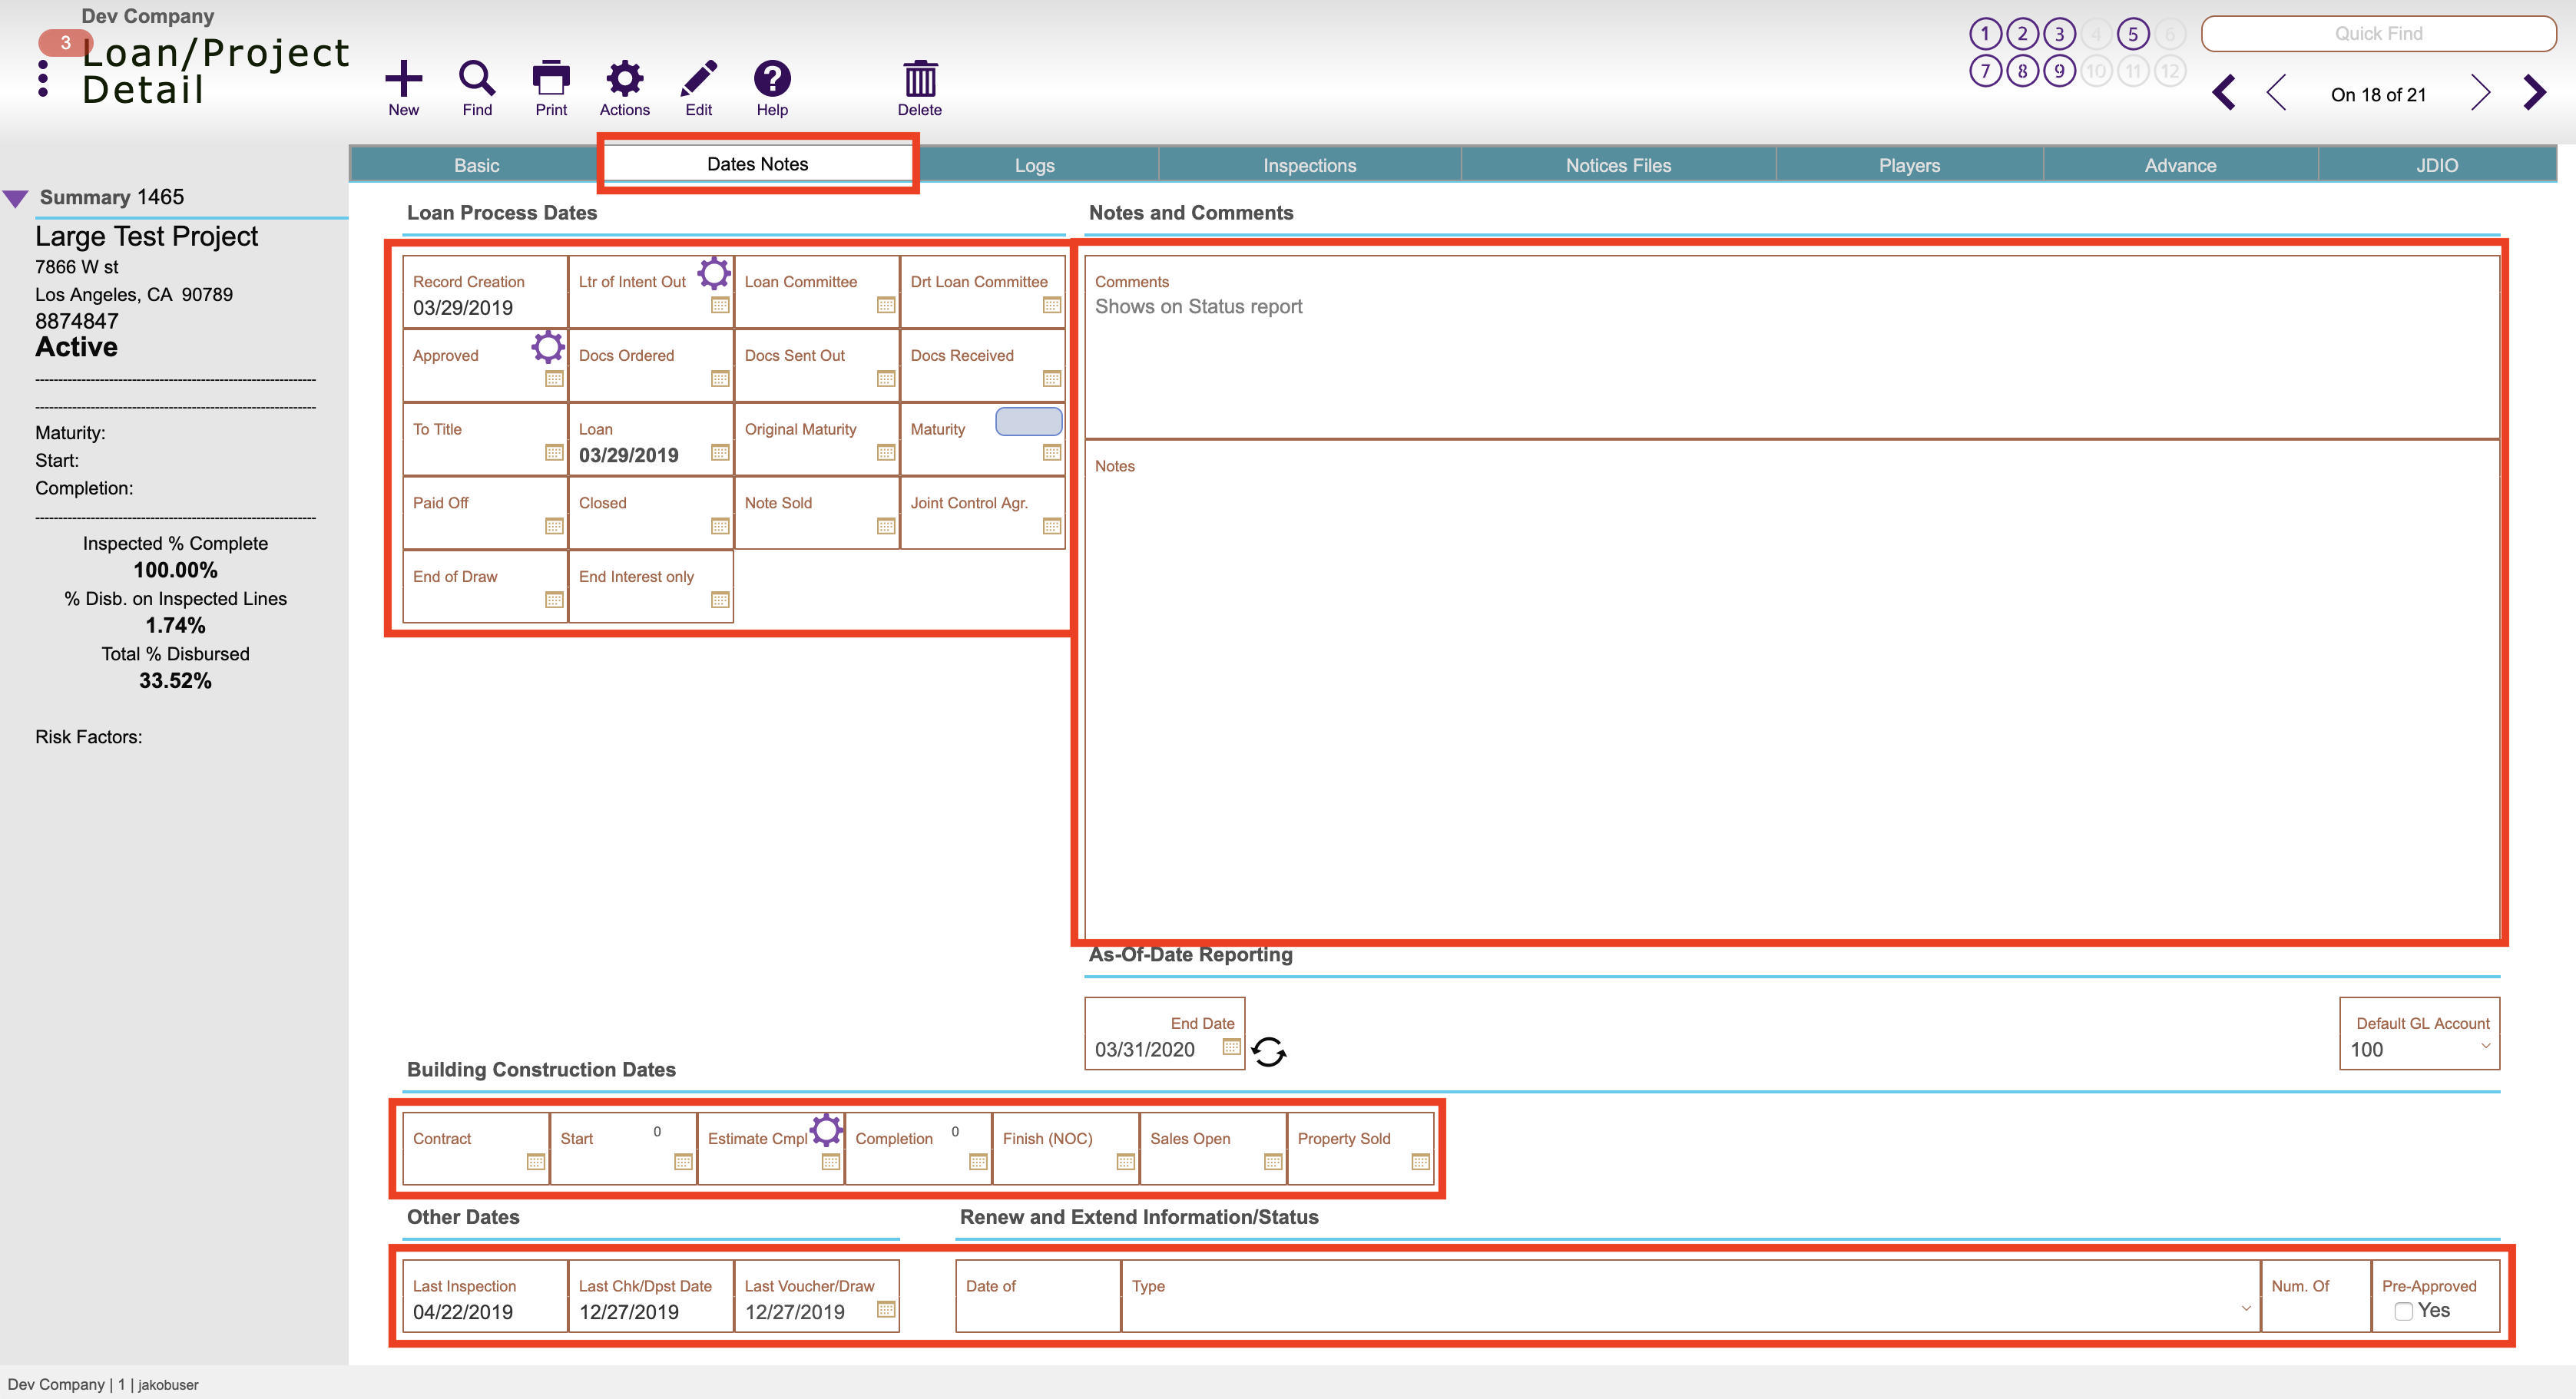
Dates Notes tab: Where all the loan dates are tracked and entered, any comments about project that appear on reports, and any internal notes
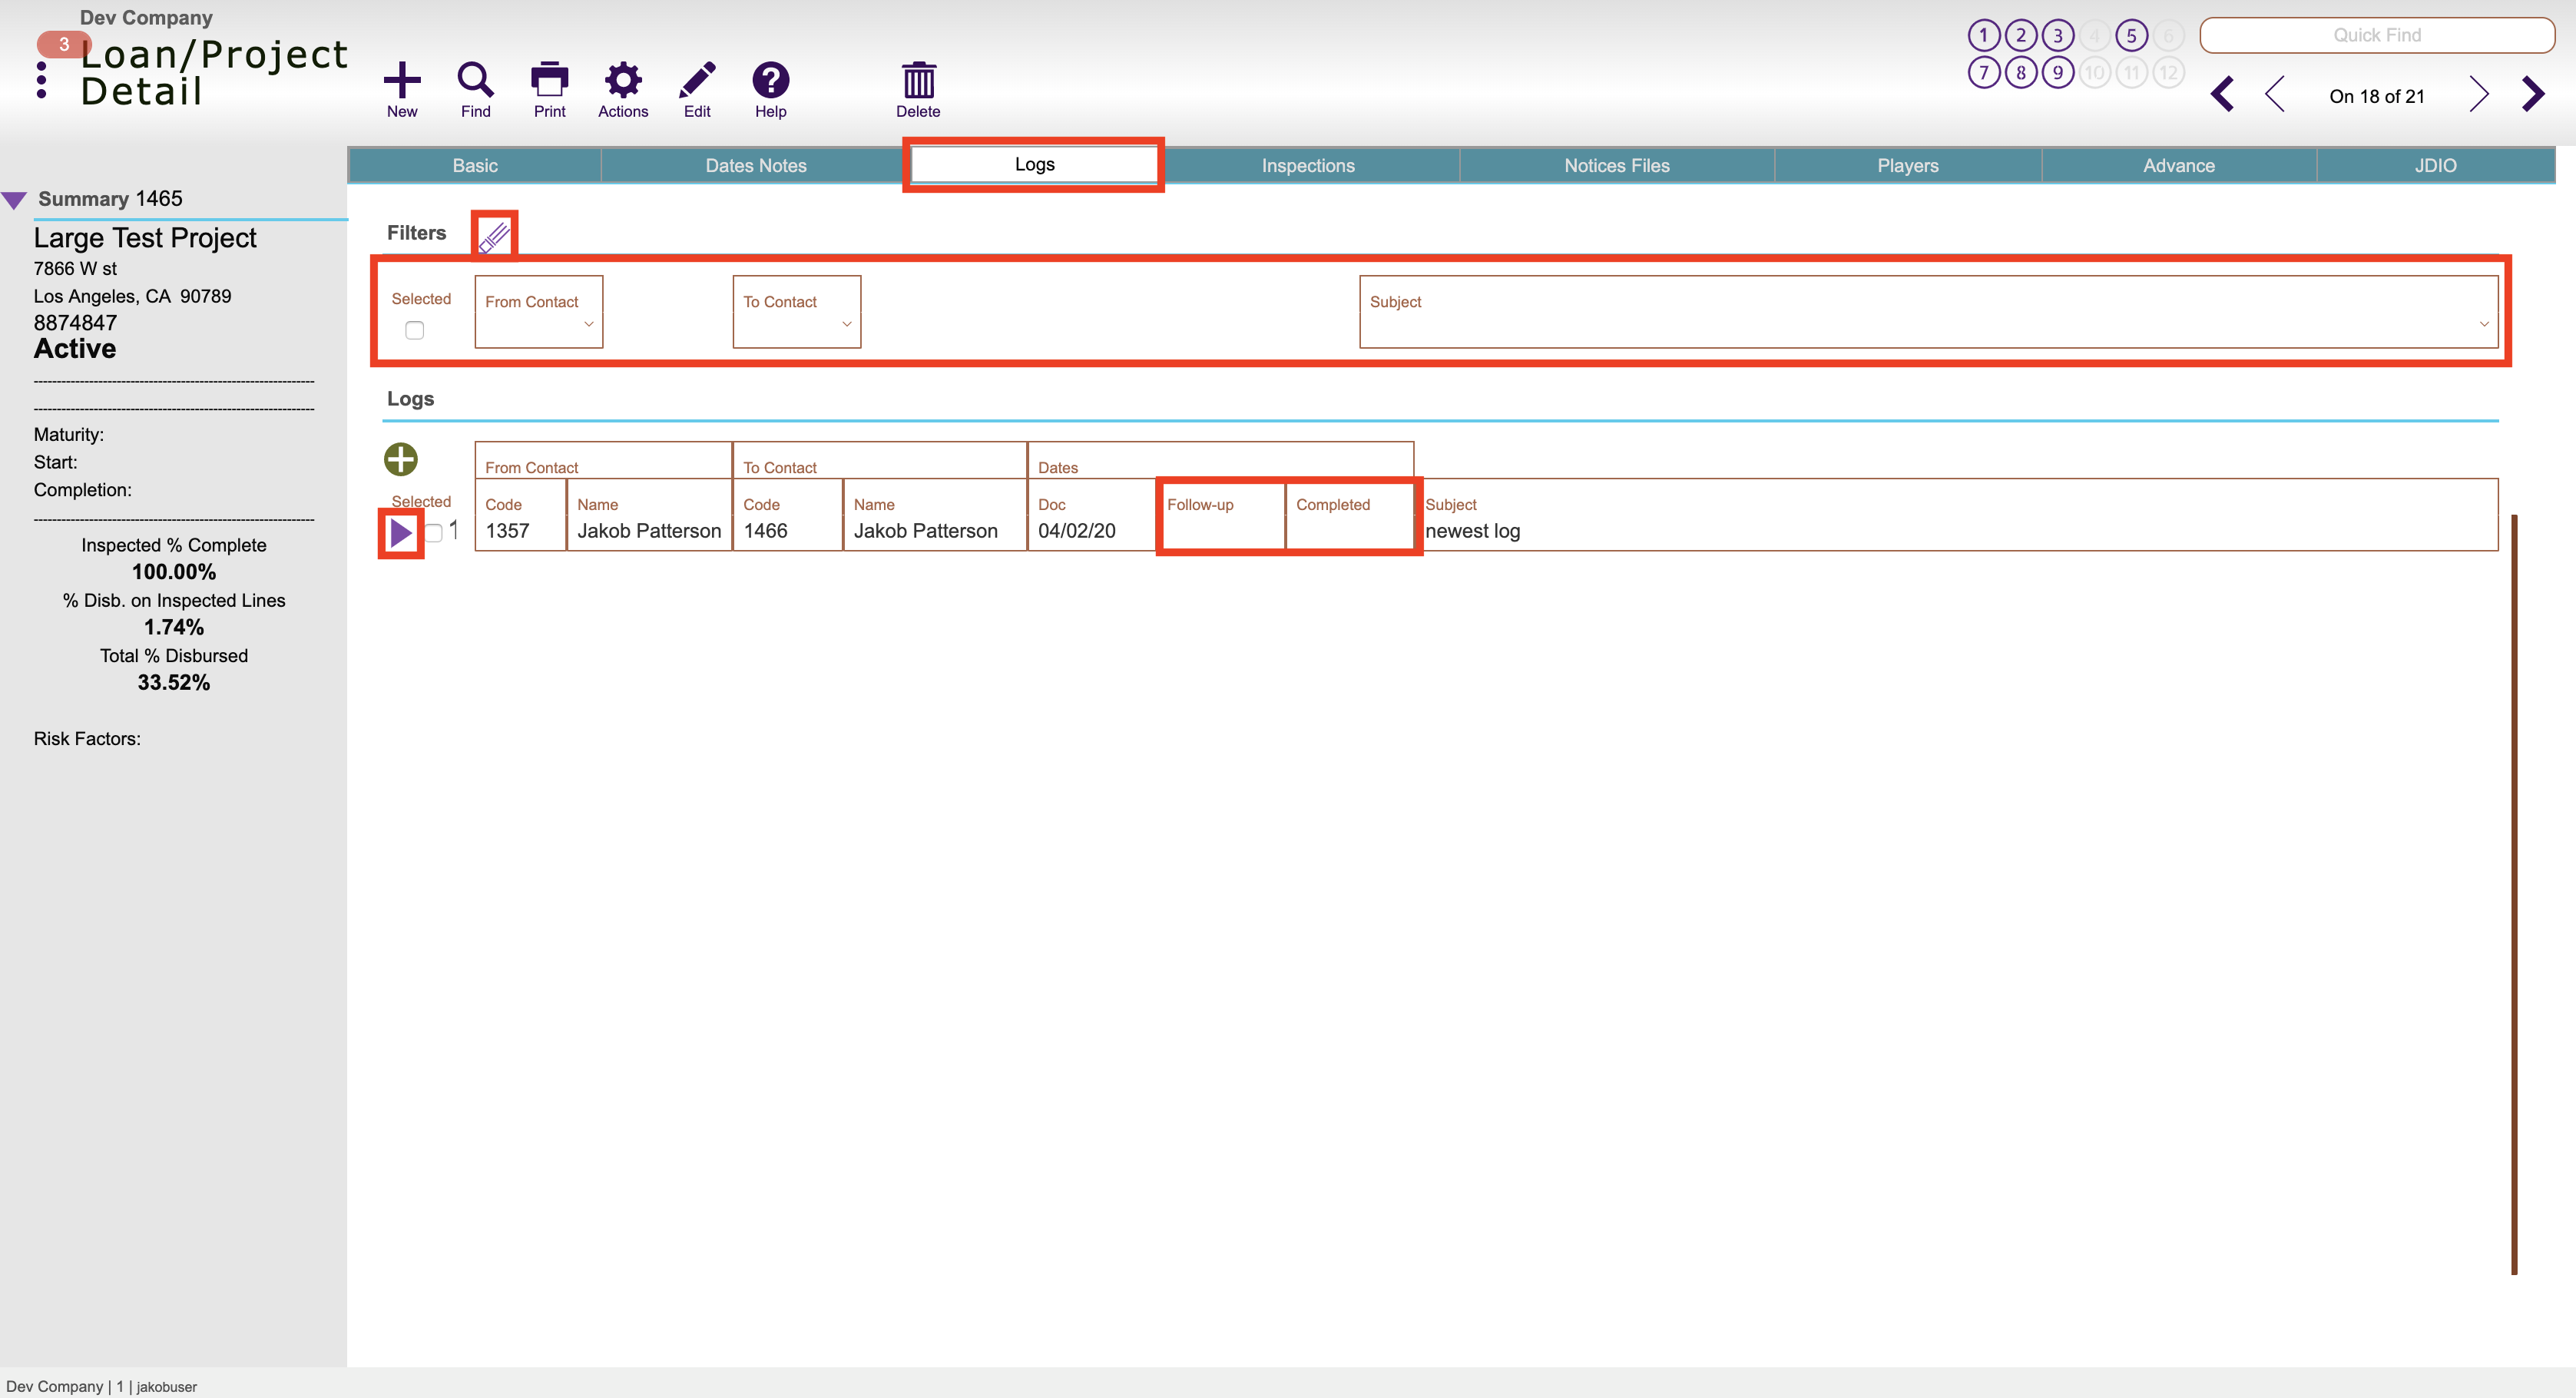
Logs tab: Shows the list of communication logs tied to this project, you can sort the list of logs by the criteria at the top of this tab and can enter in any dates regarding followup or completion of a communication log
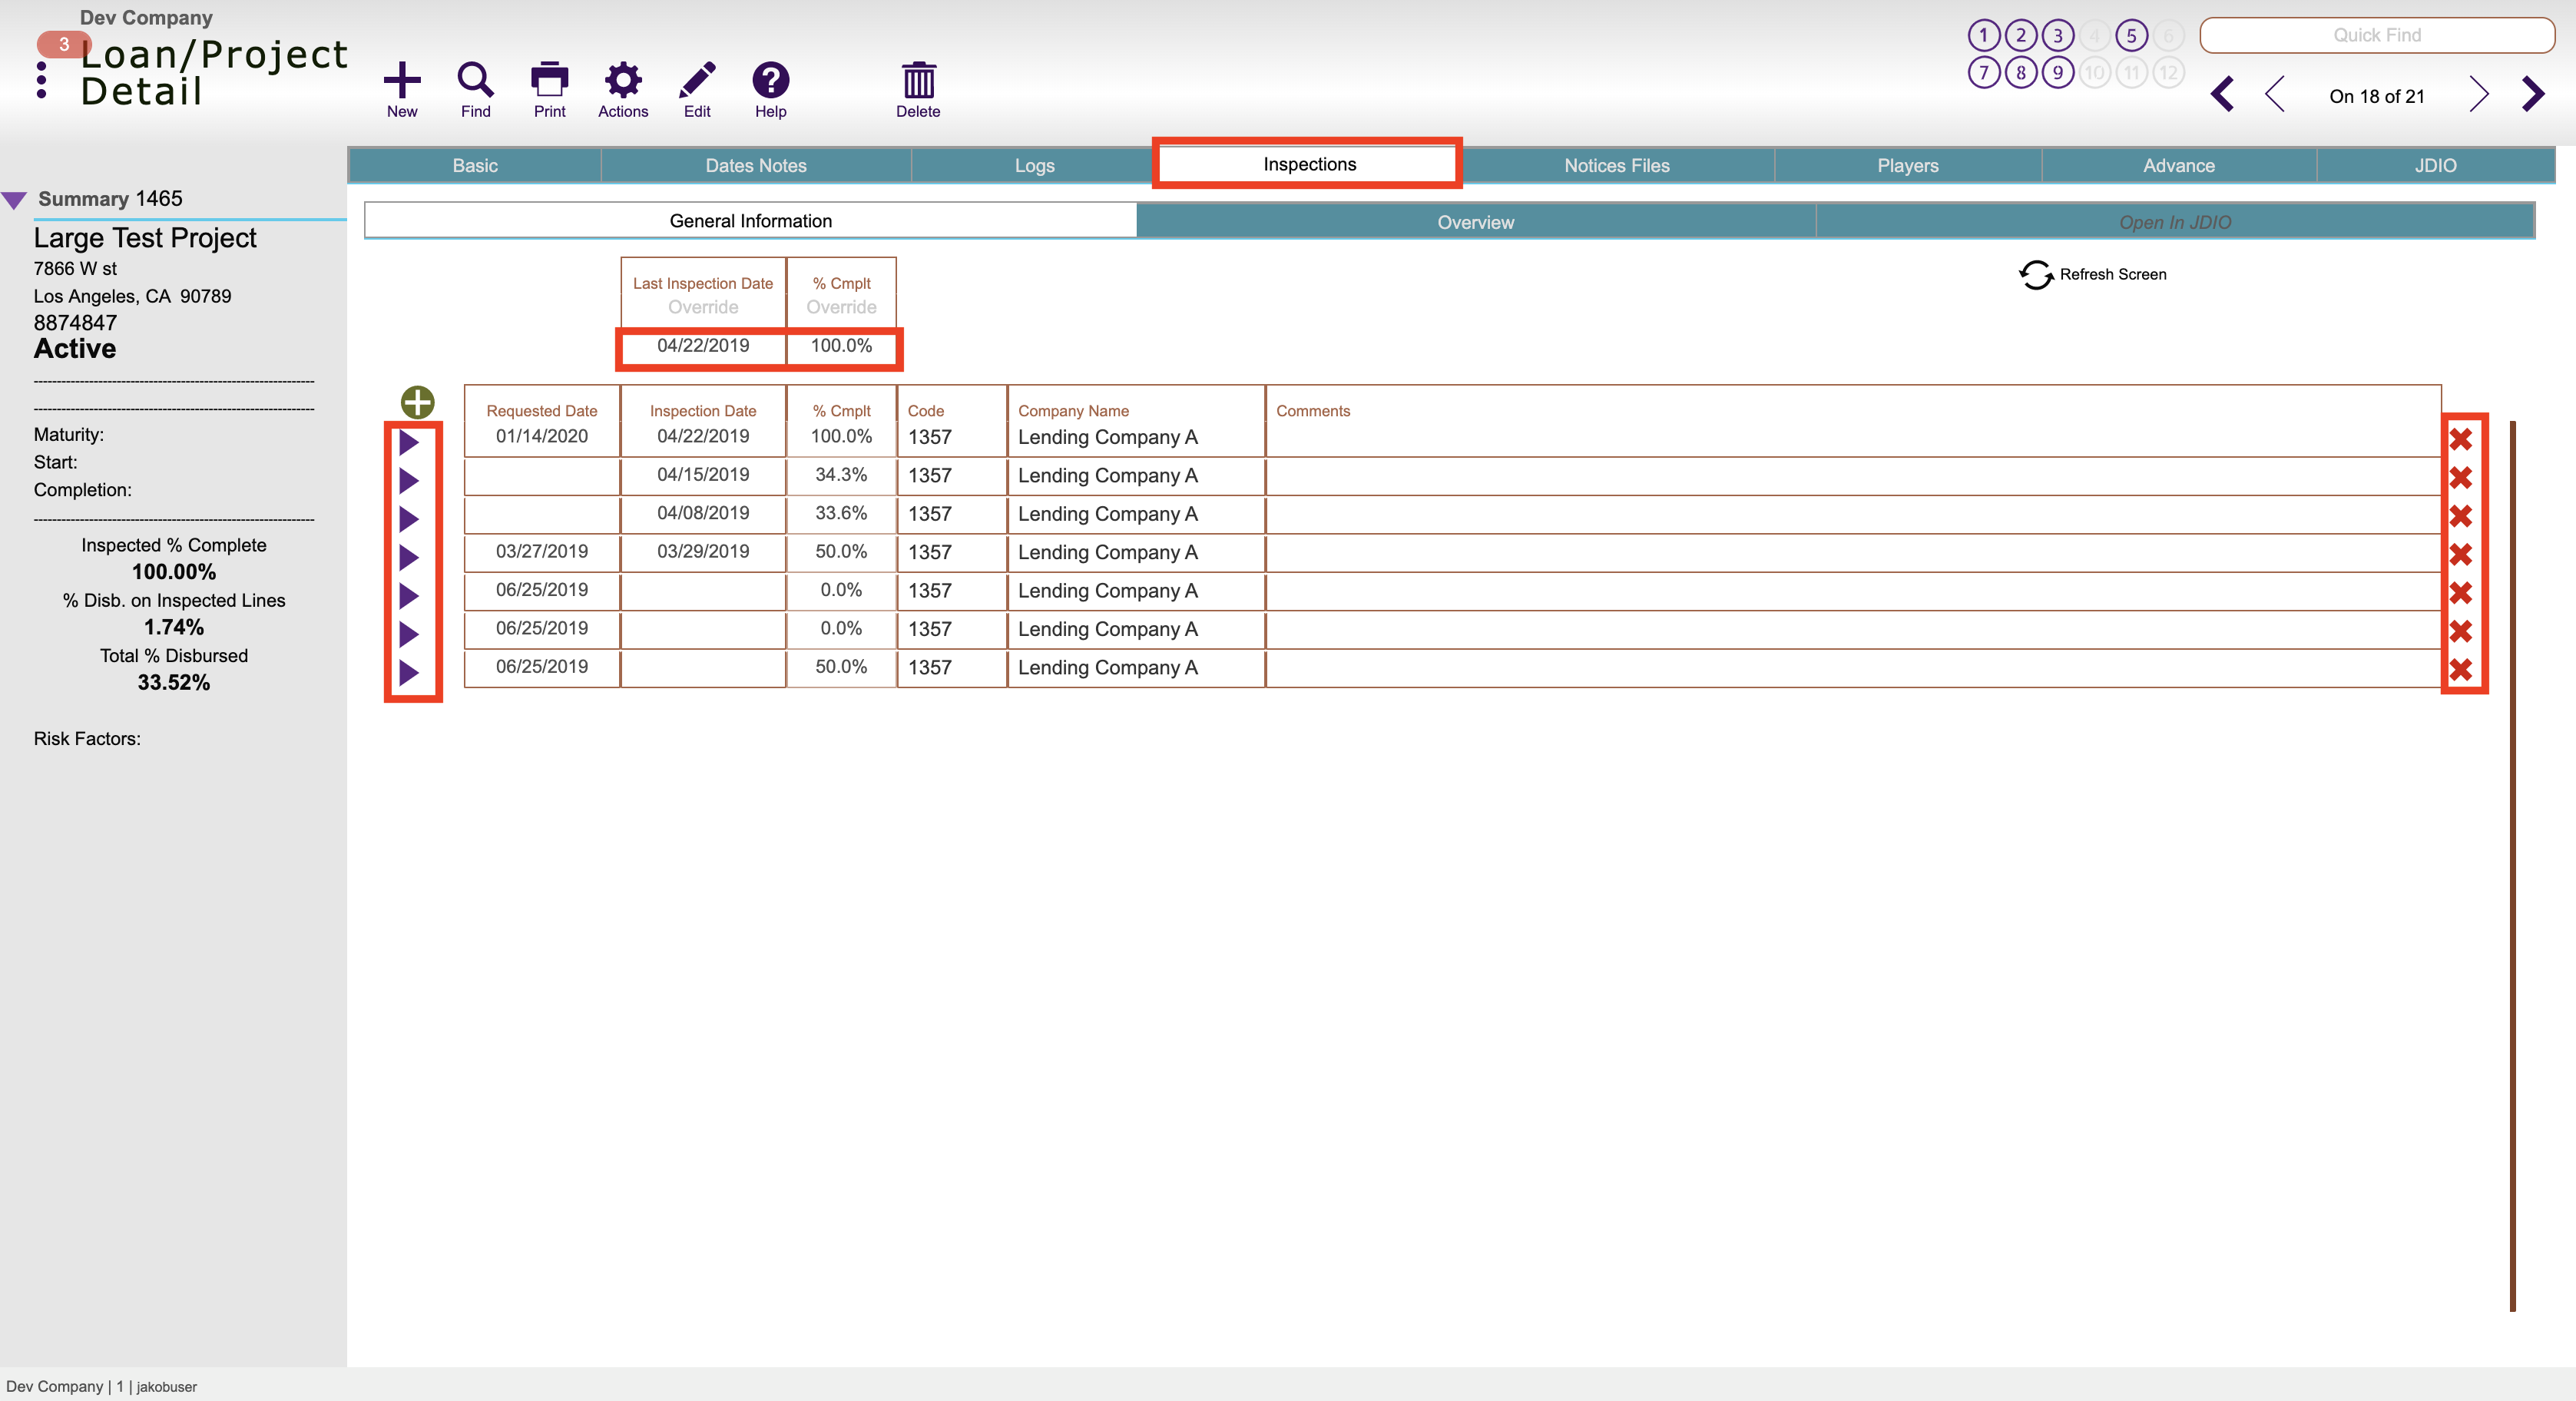
Inspections tab: Shows the list of inspections for the project, the total percent complete, you can delete inspections using the red X button, and the Overview tab is a line item overview of the inspected amounts
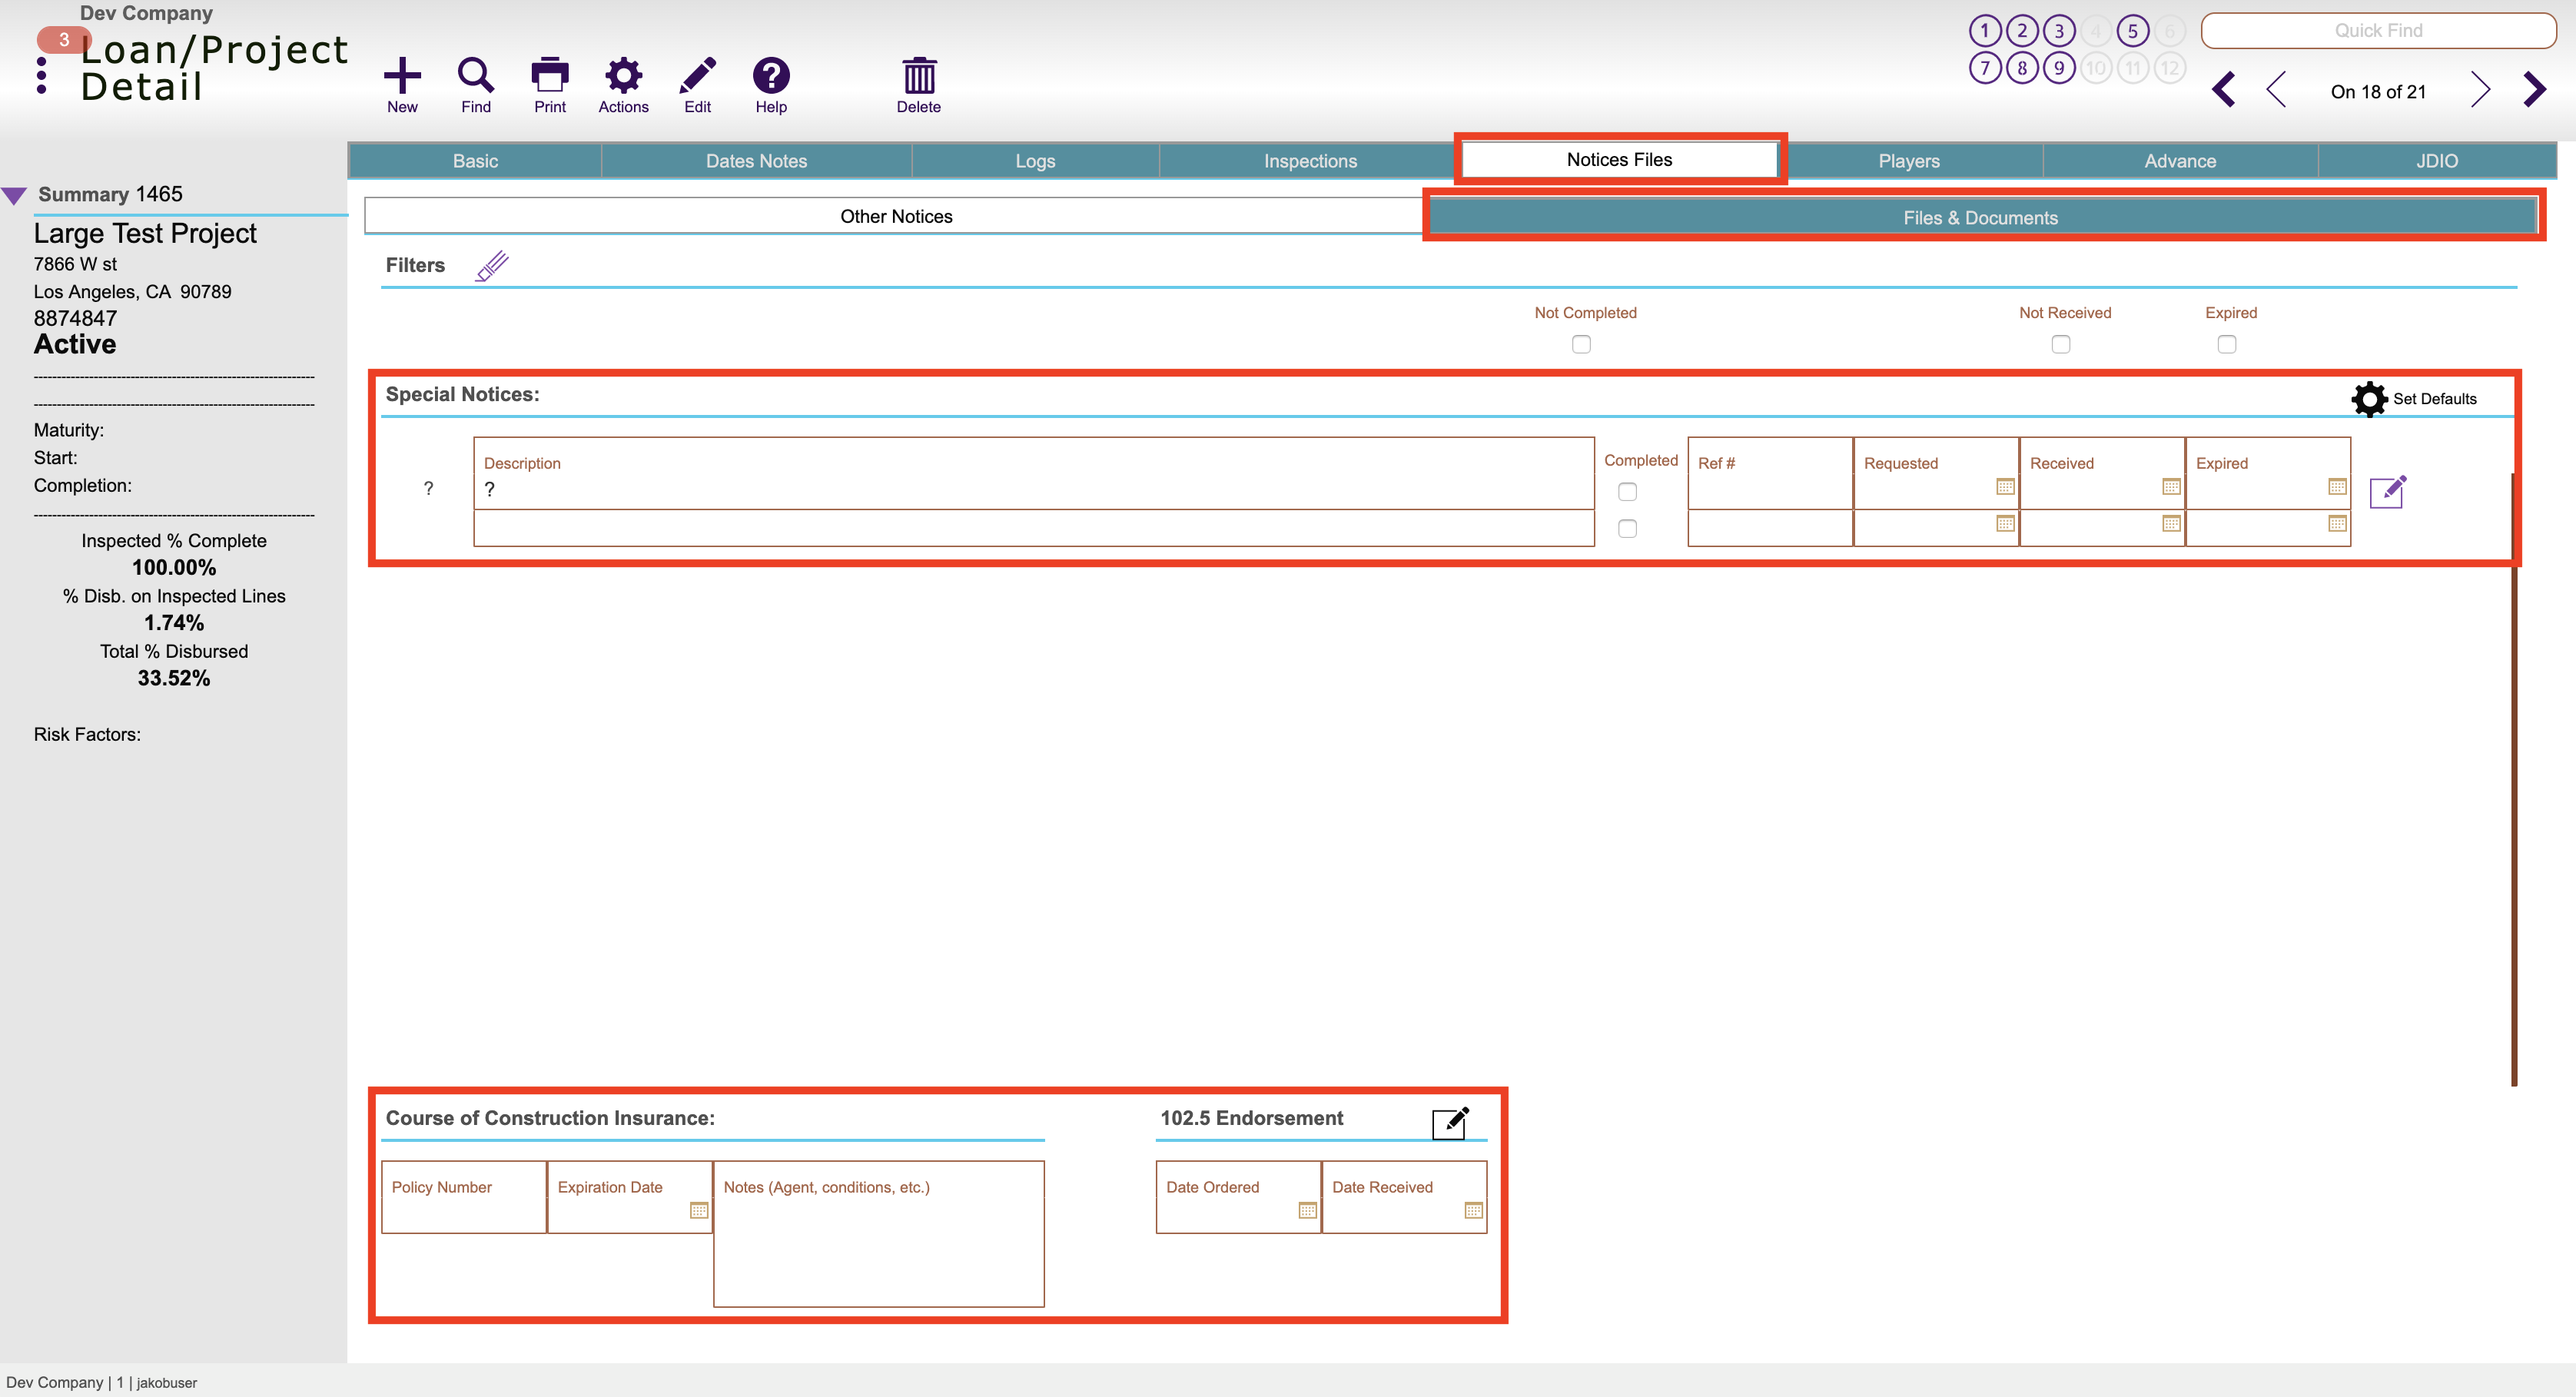
Notice Files tab: Where your special notices that you track (setup here) are, course of construction insurance is tracked, and the file/documents tab is where you attach the general project files
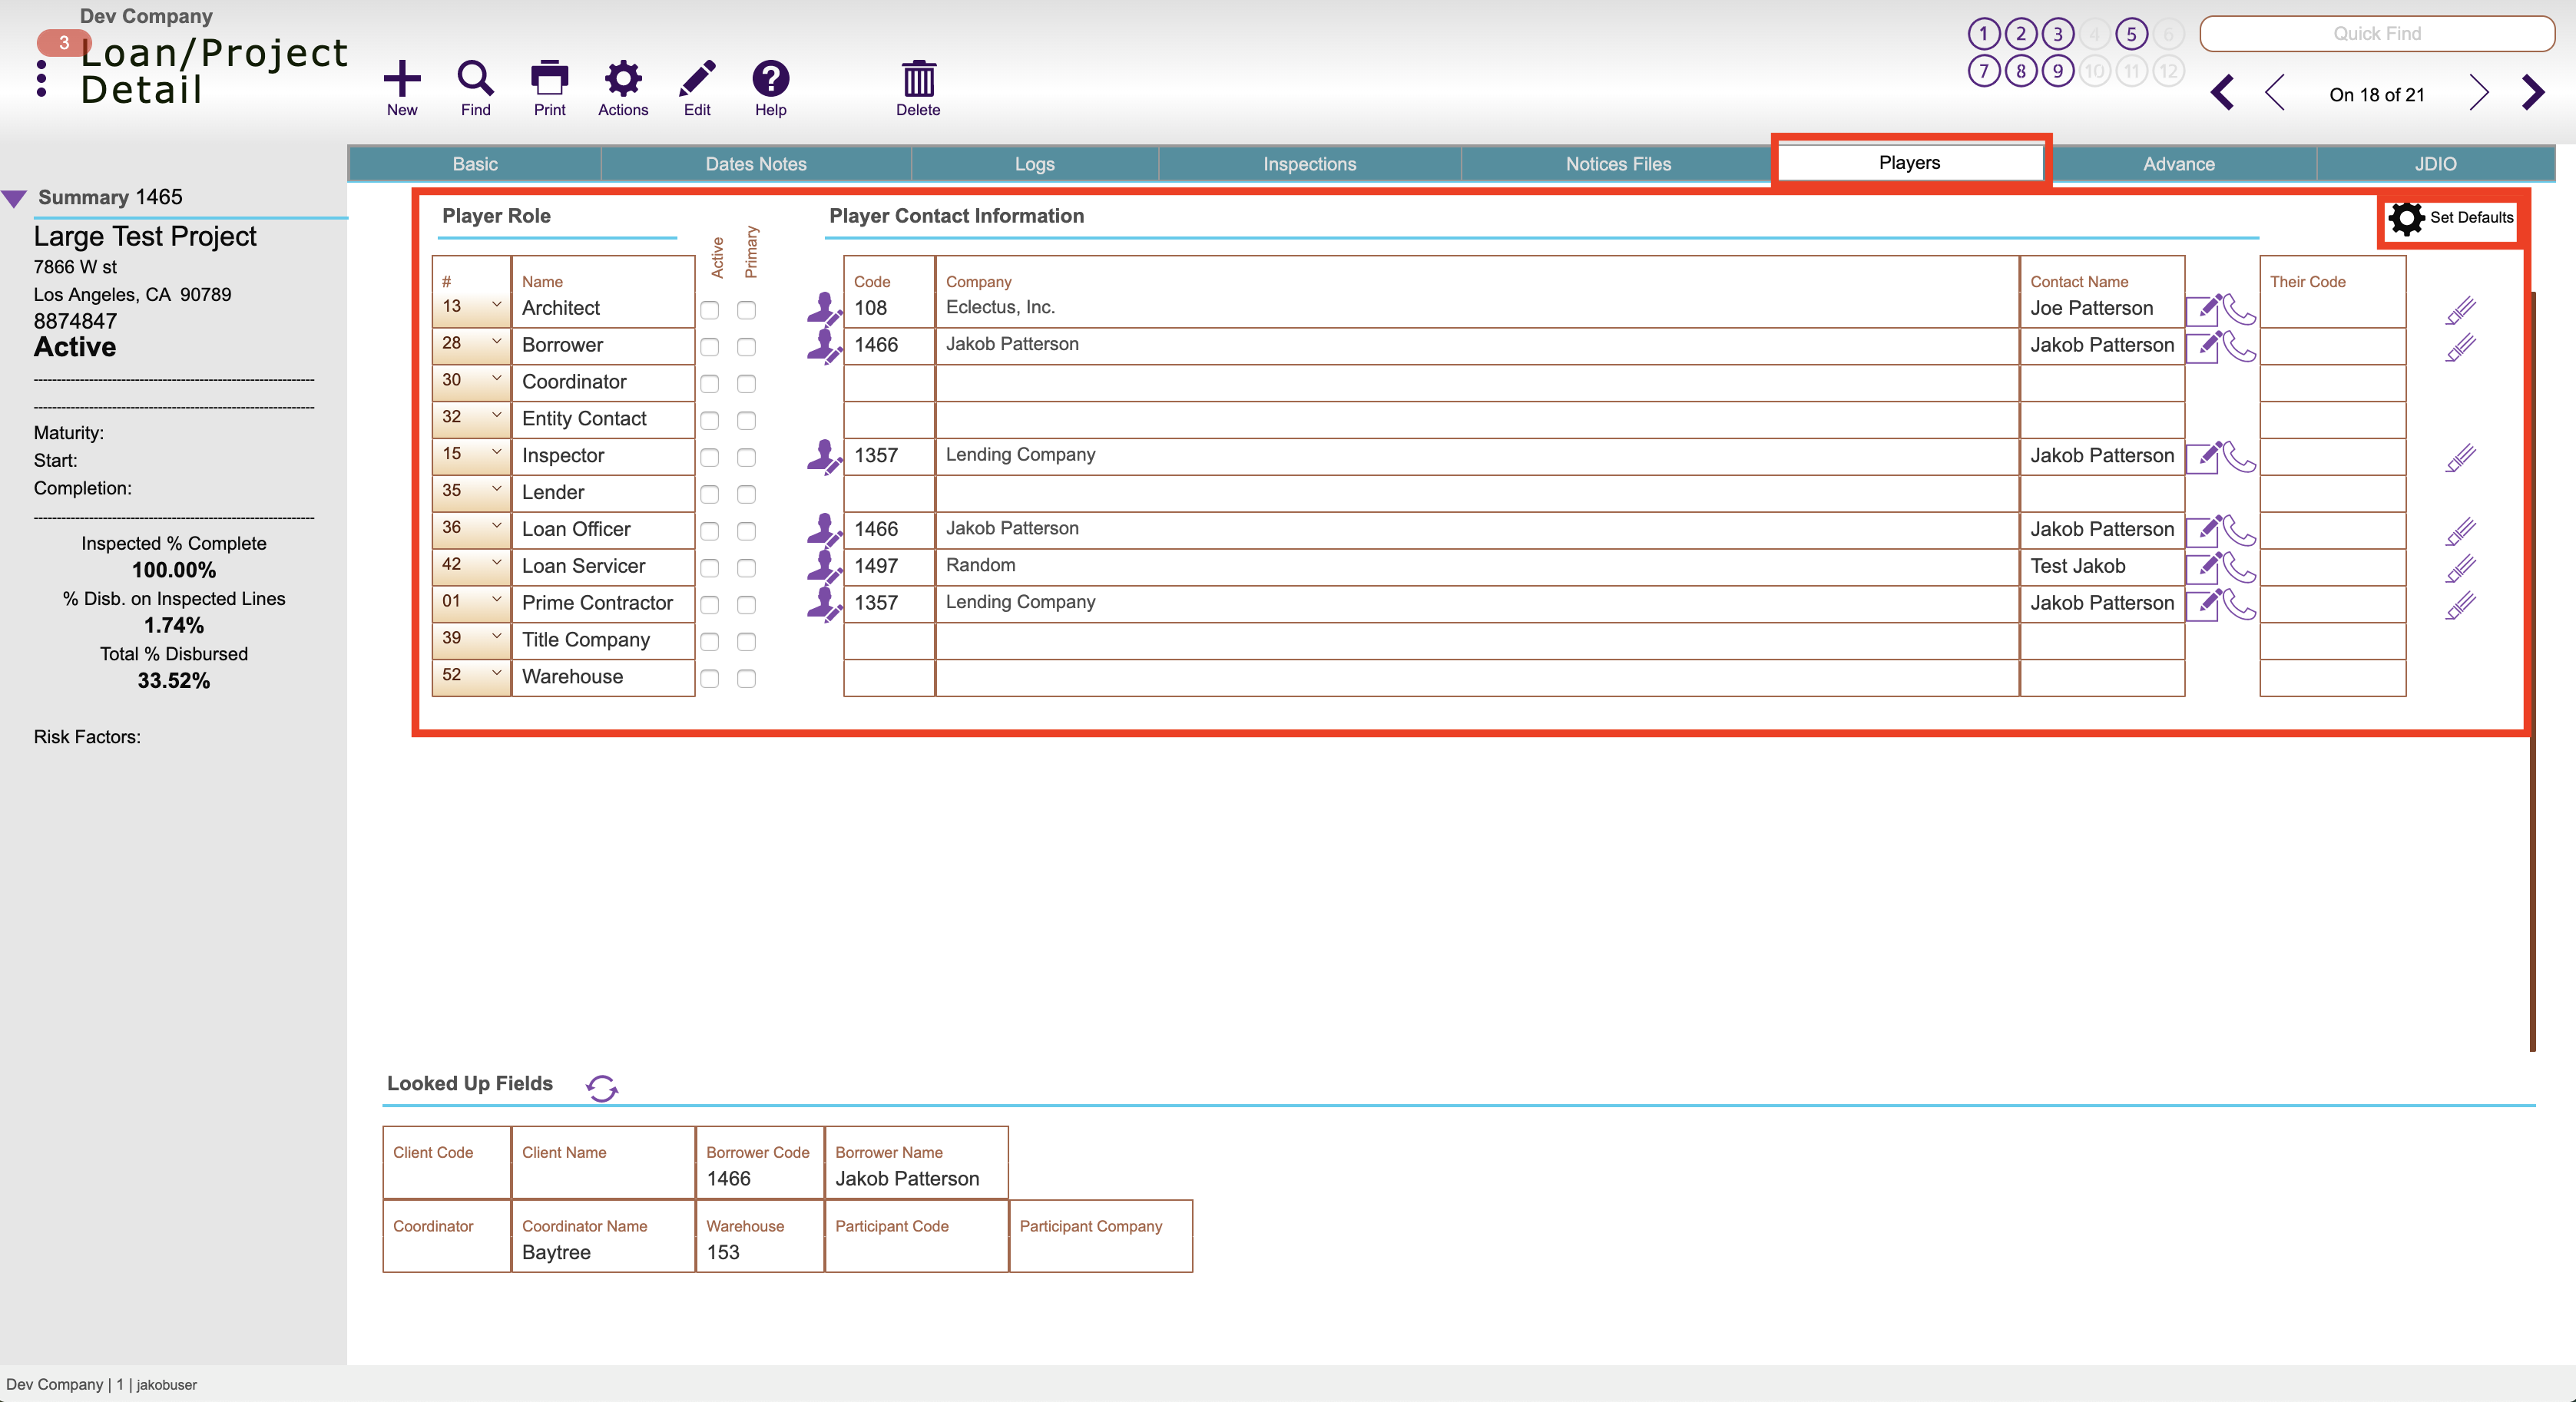
Players tab: All contacts tied to this project are entered (guide to that here) and the set defaults button enters your company default players (those default player type slots are setup here)
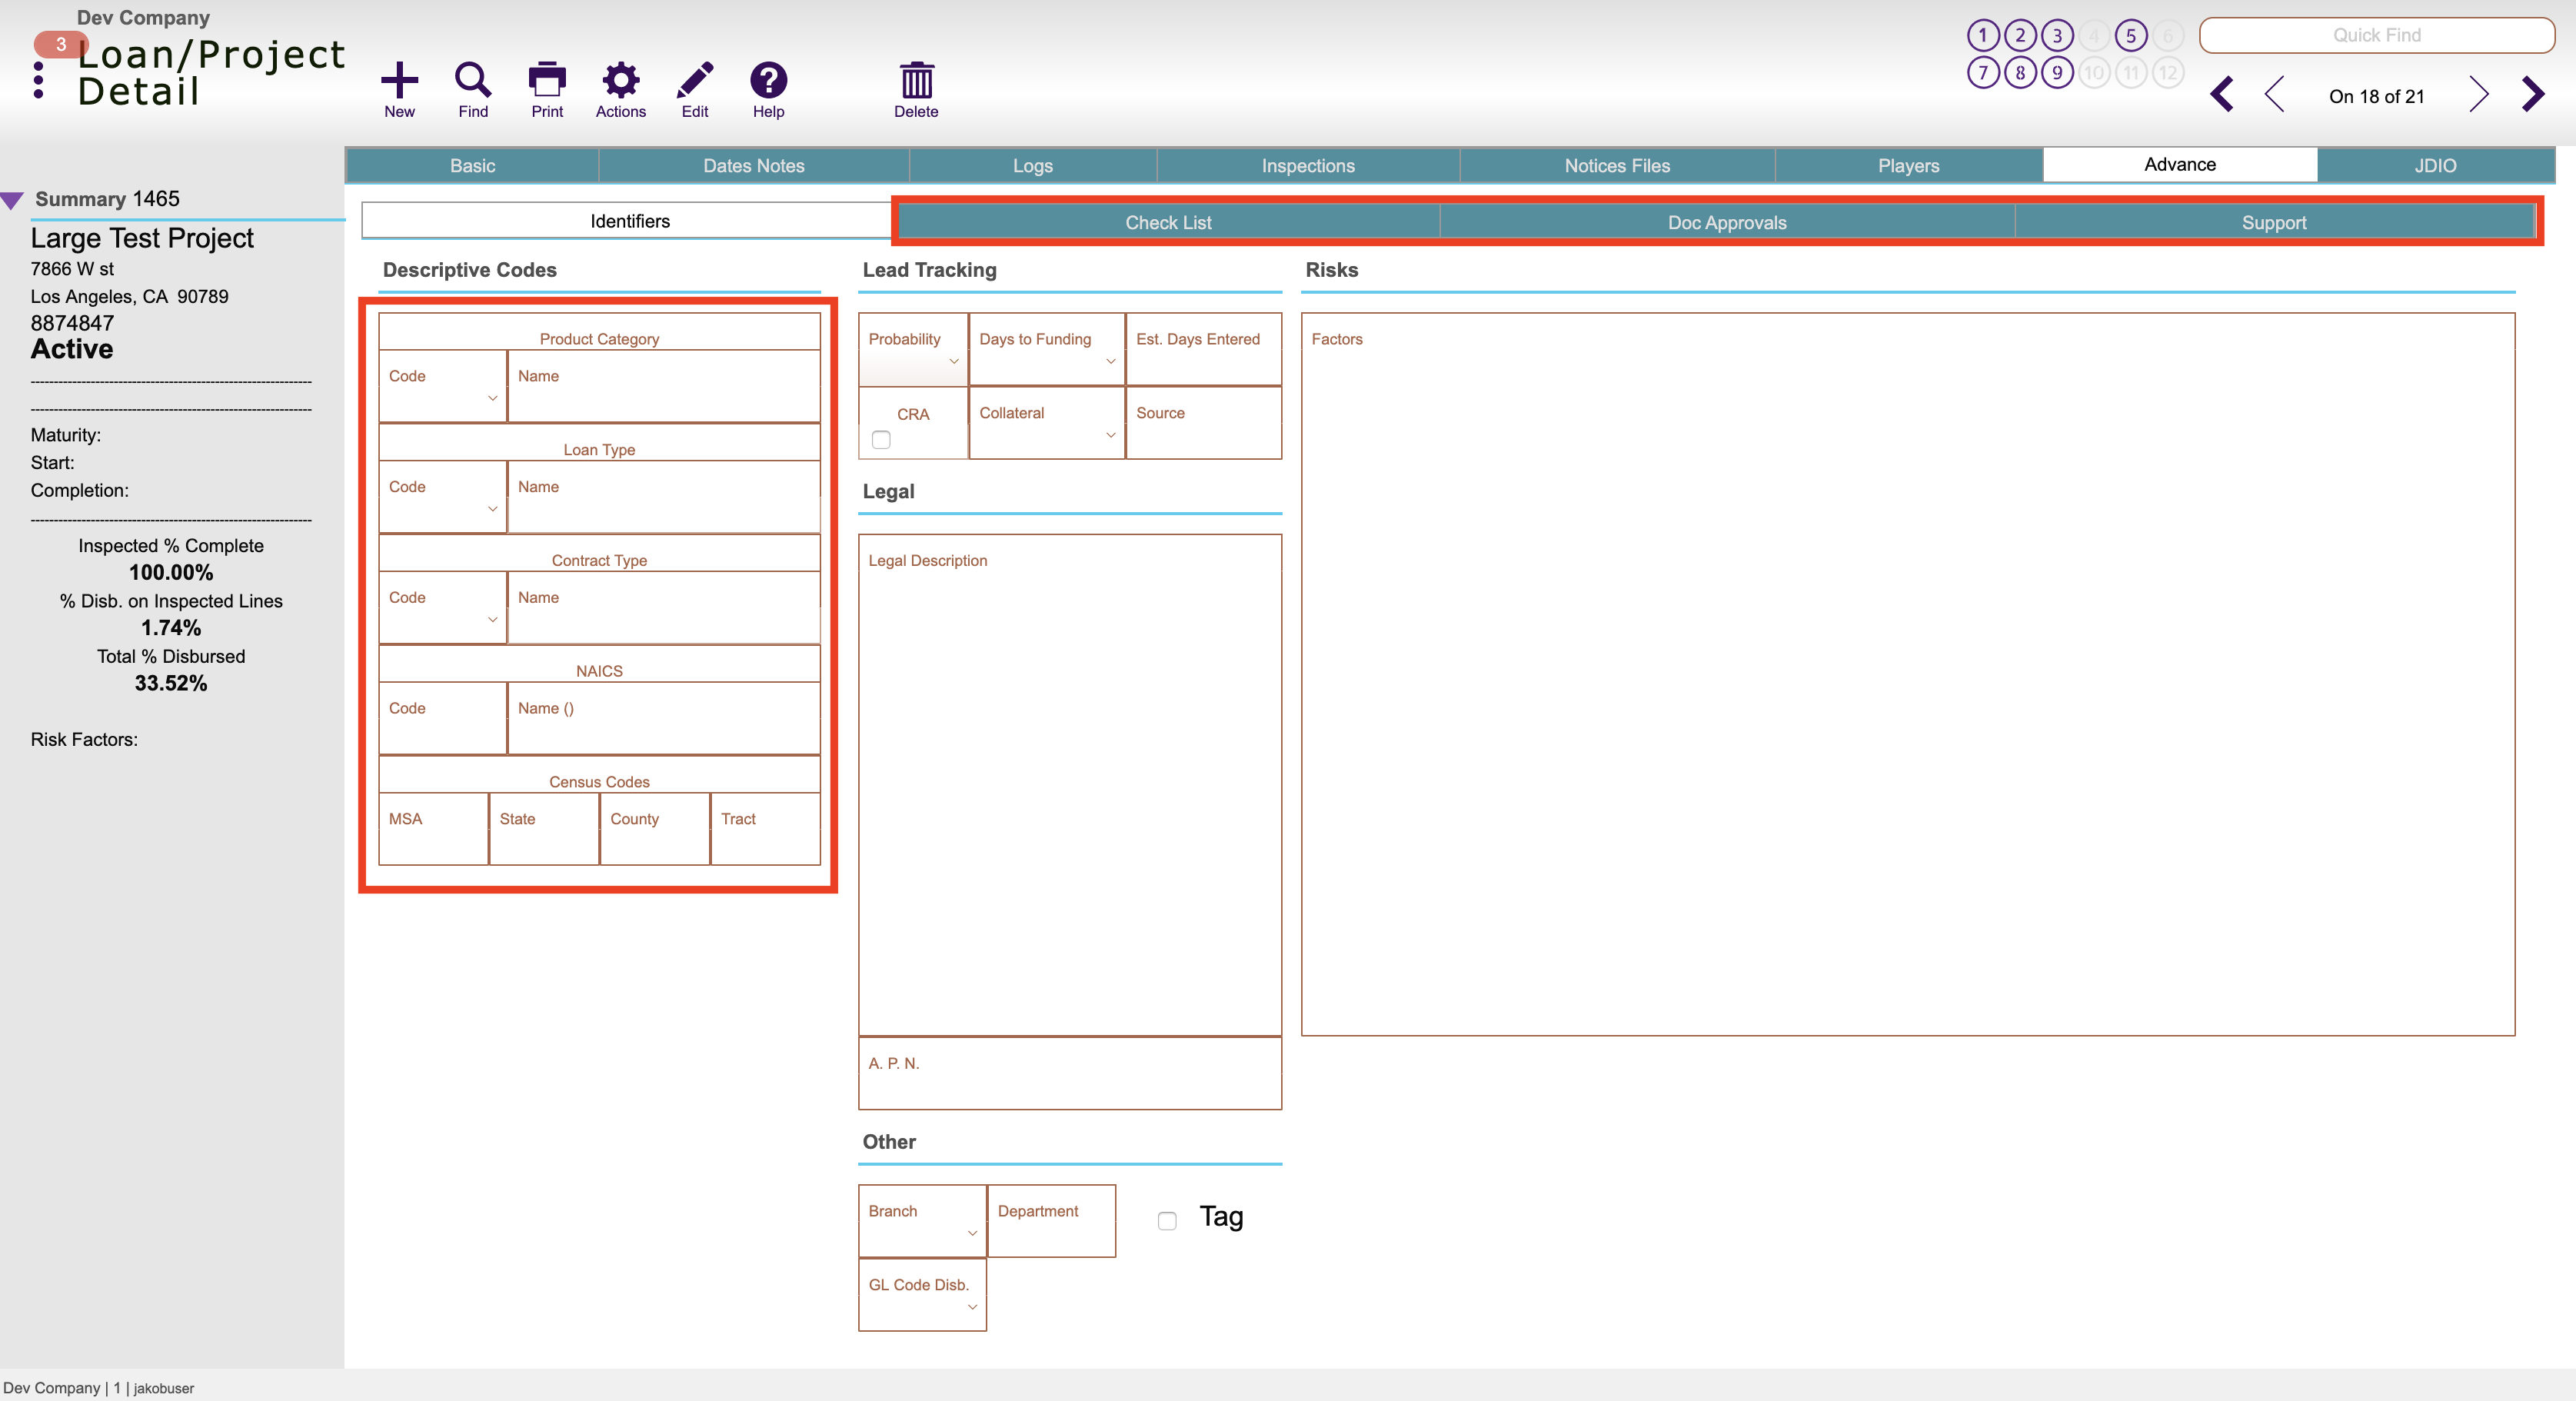
Advance tab: Where more project information is entered like Loan type, product category etc, the checklist tab
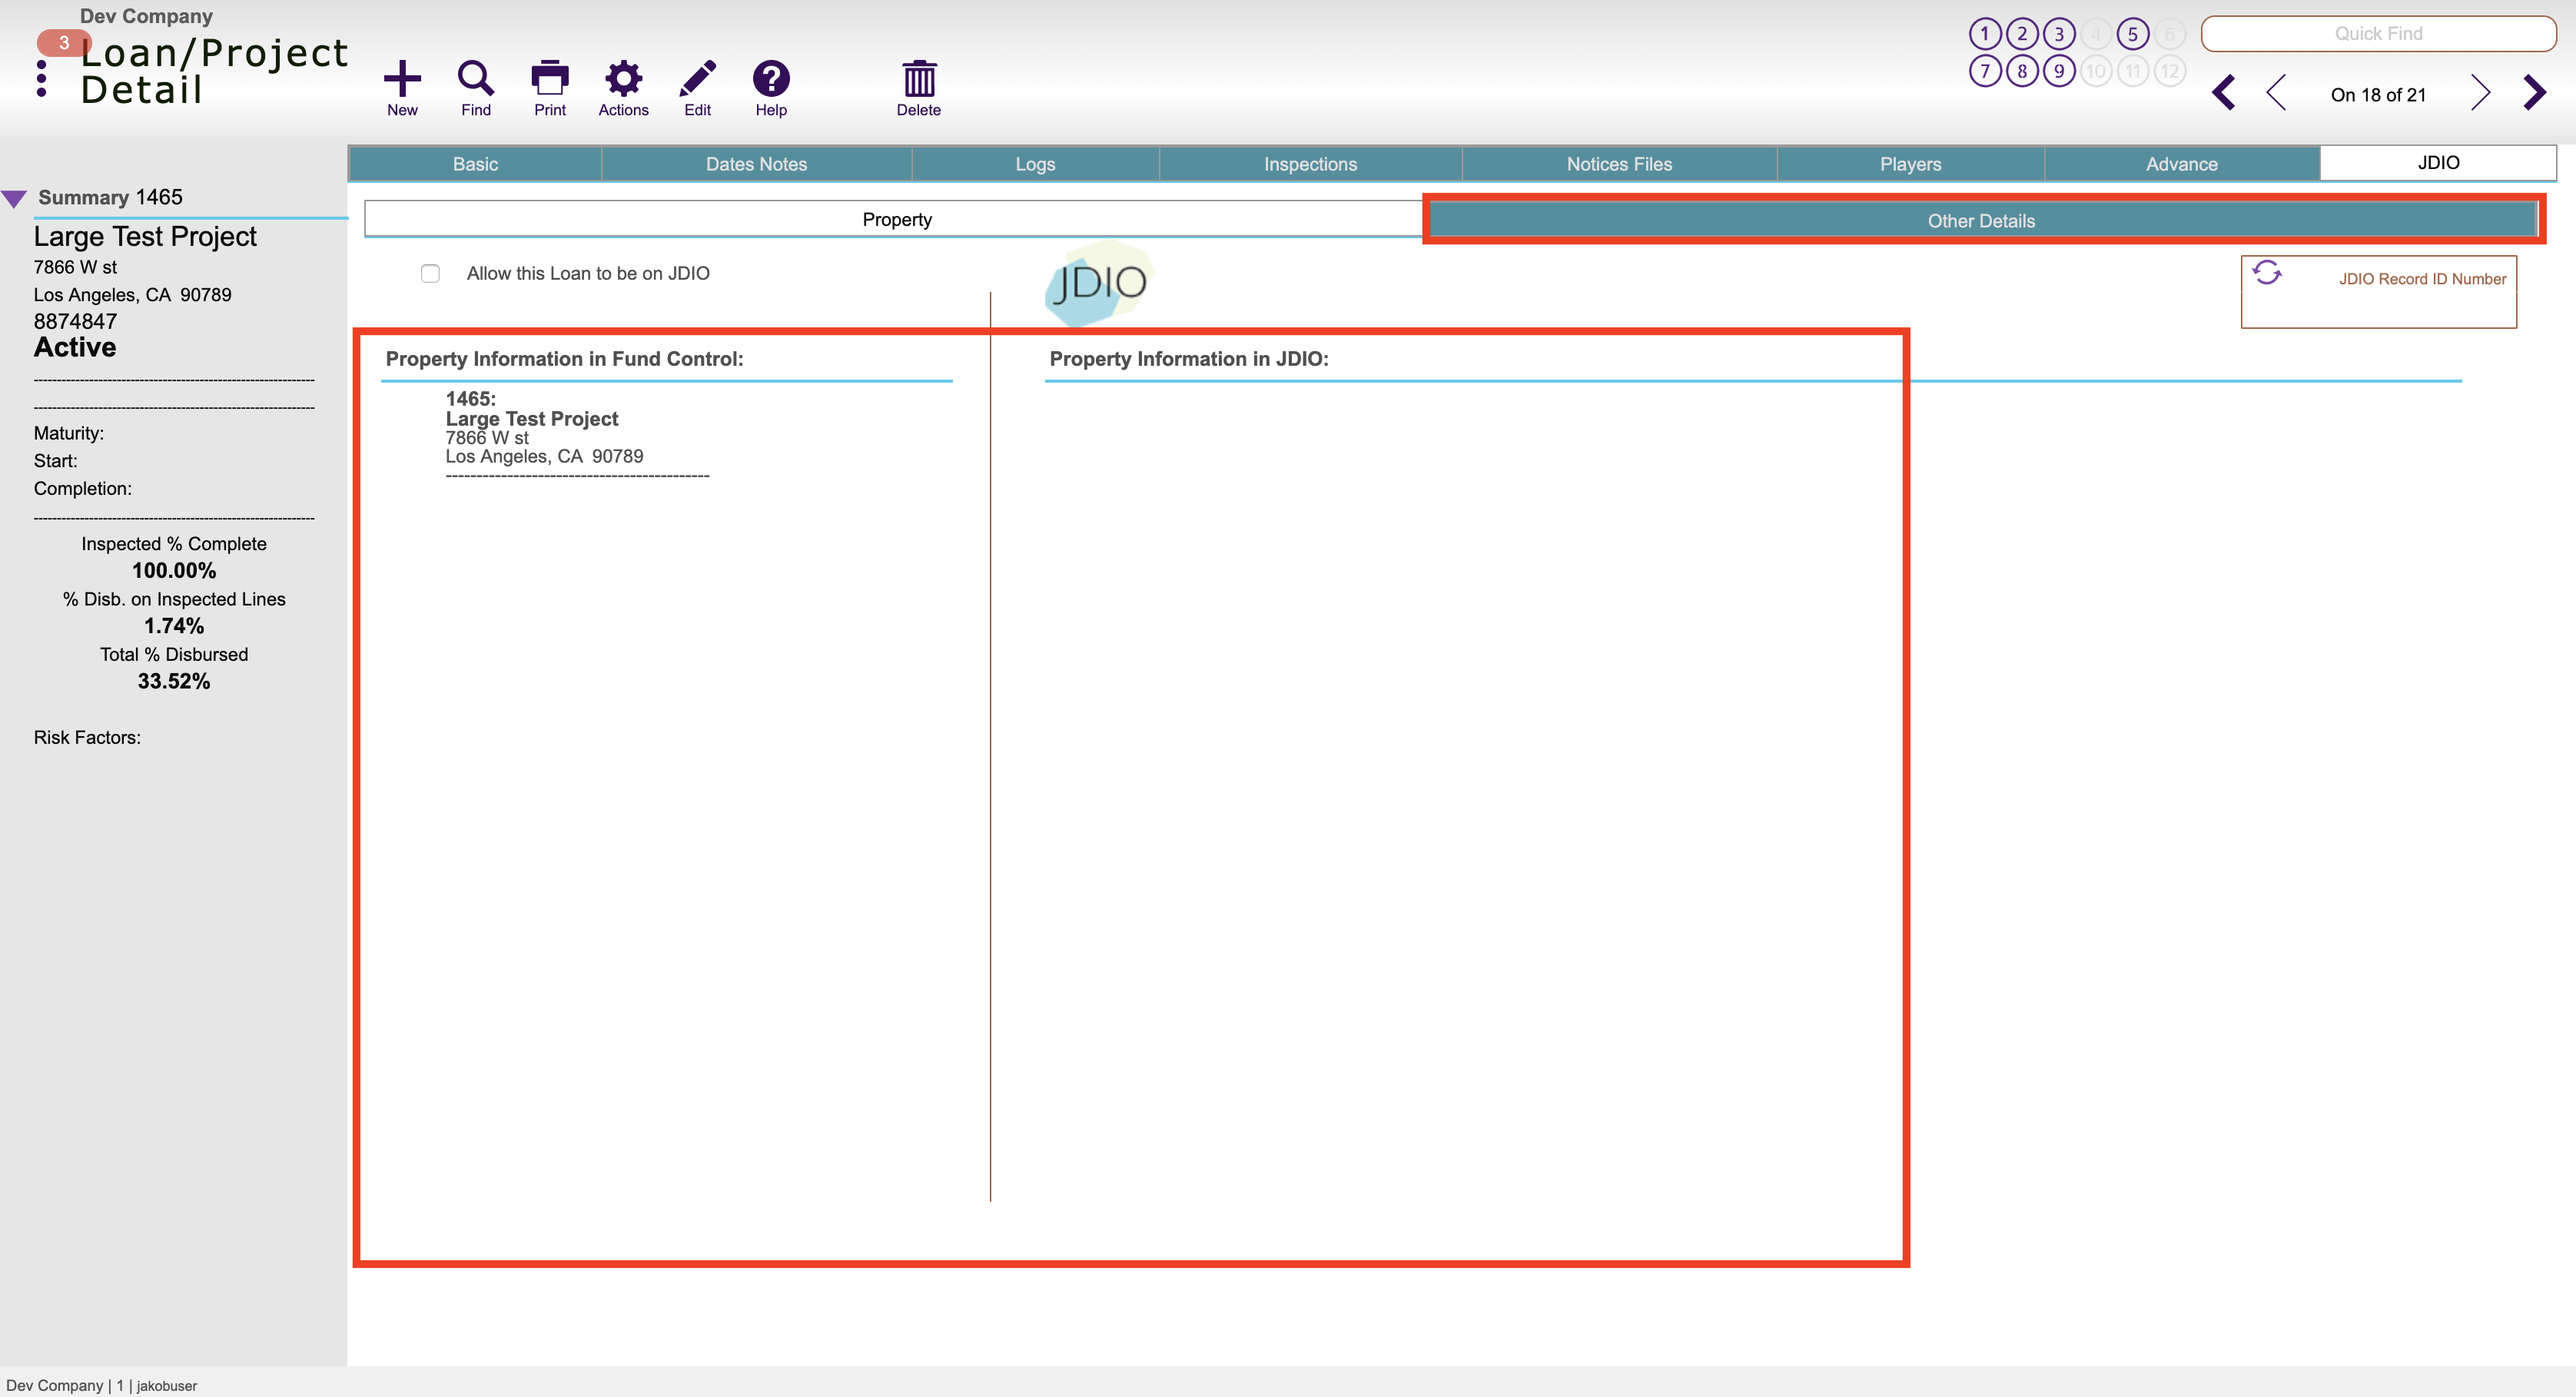
JDIO tab: Shows information related to project in JDIO – the players in JDIO as well – can look at guides on giving a project and players JDIO access
Once finished click the green Accept button.