Guide Steps
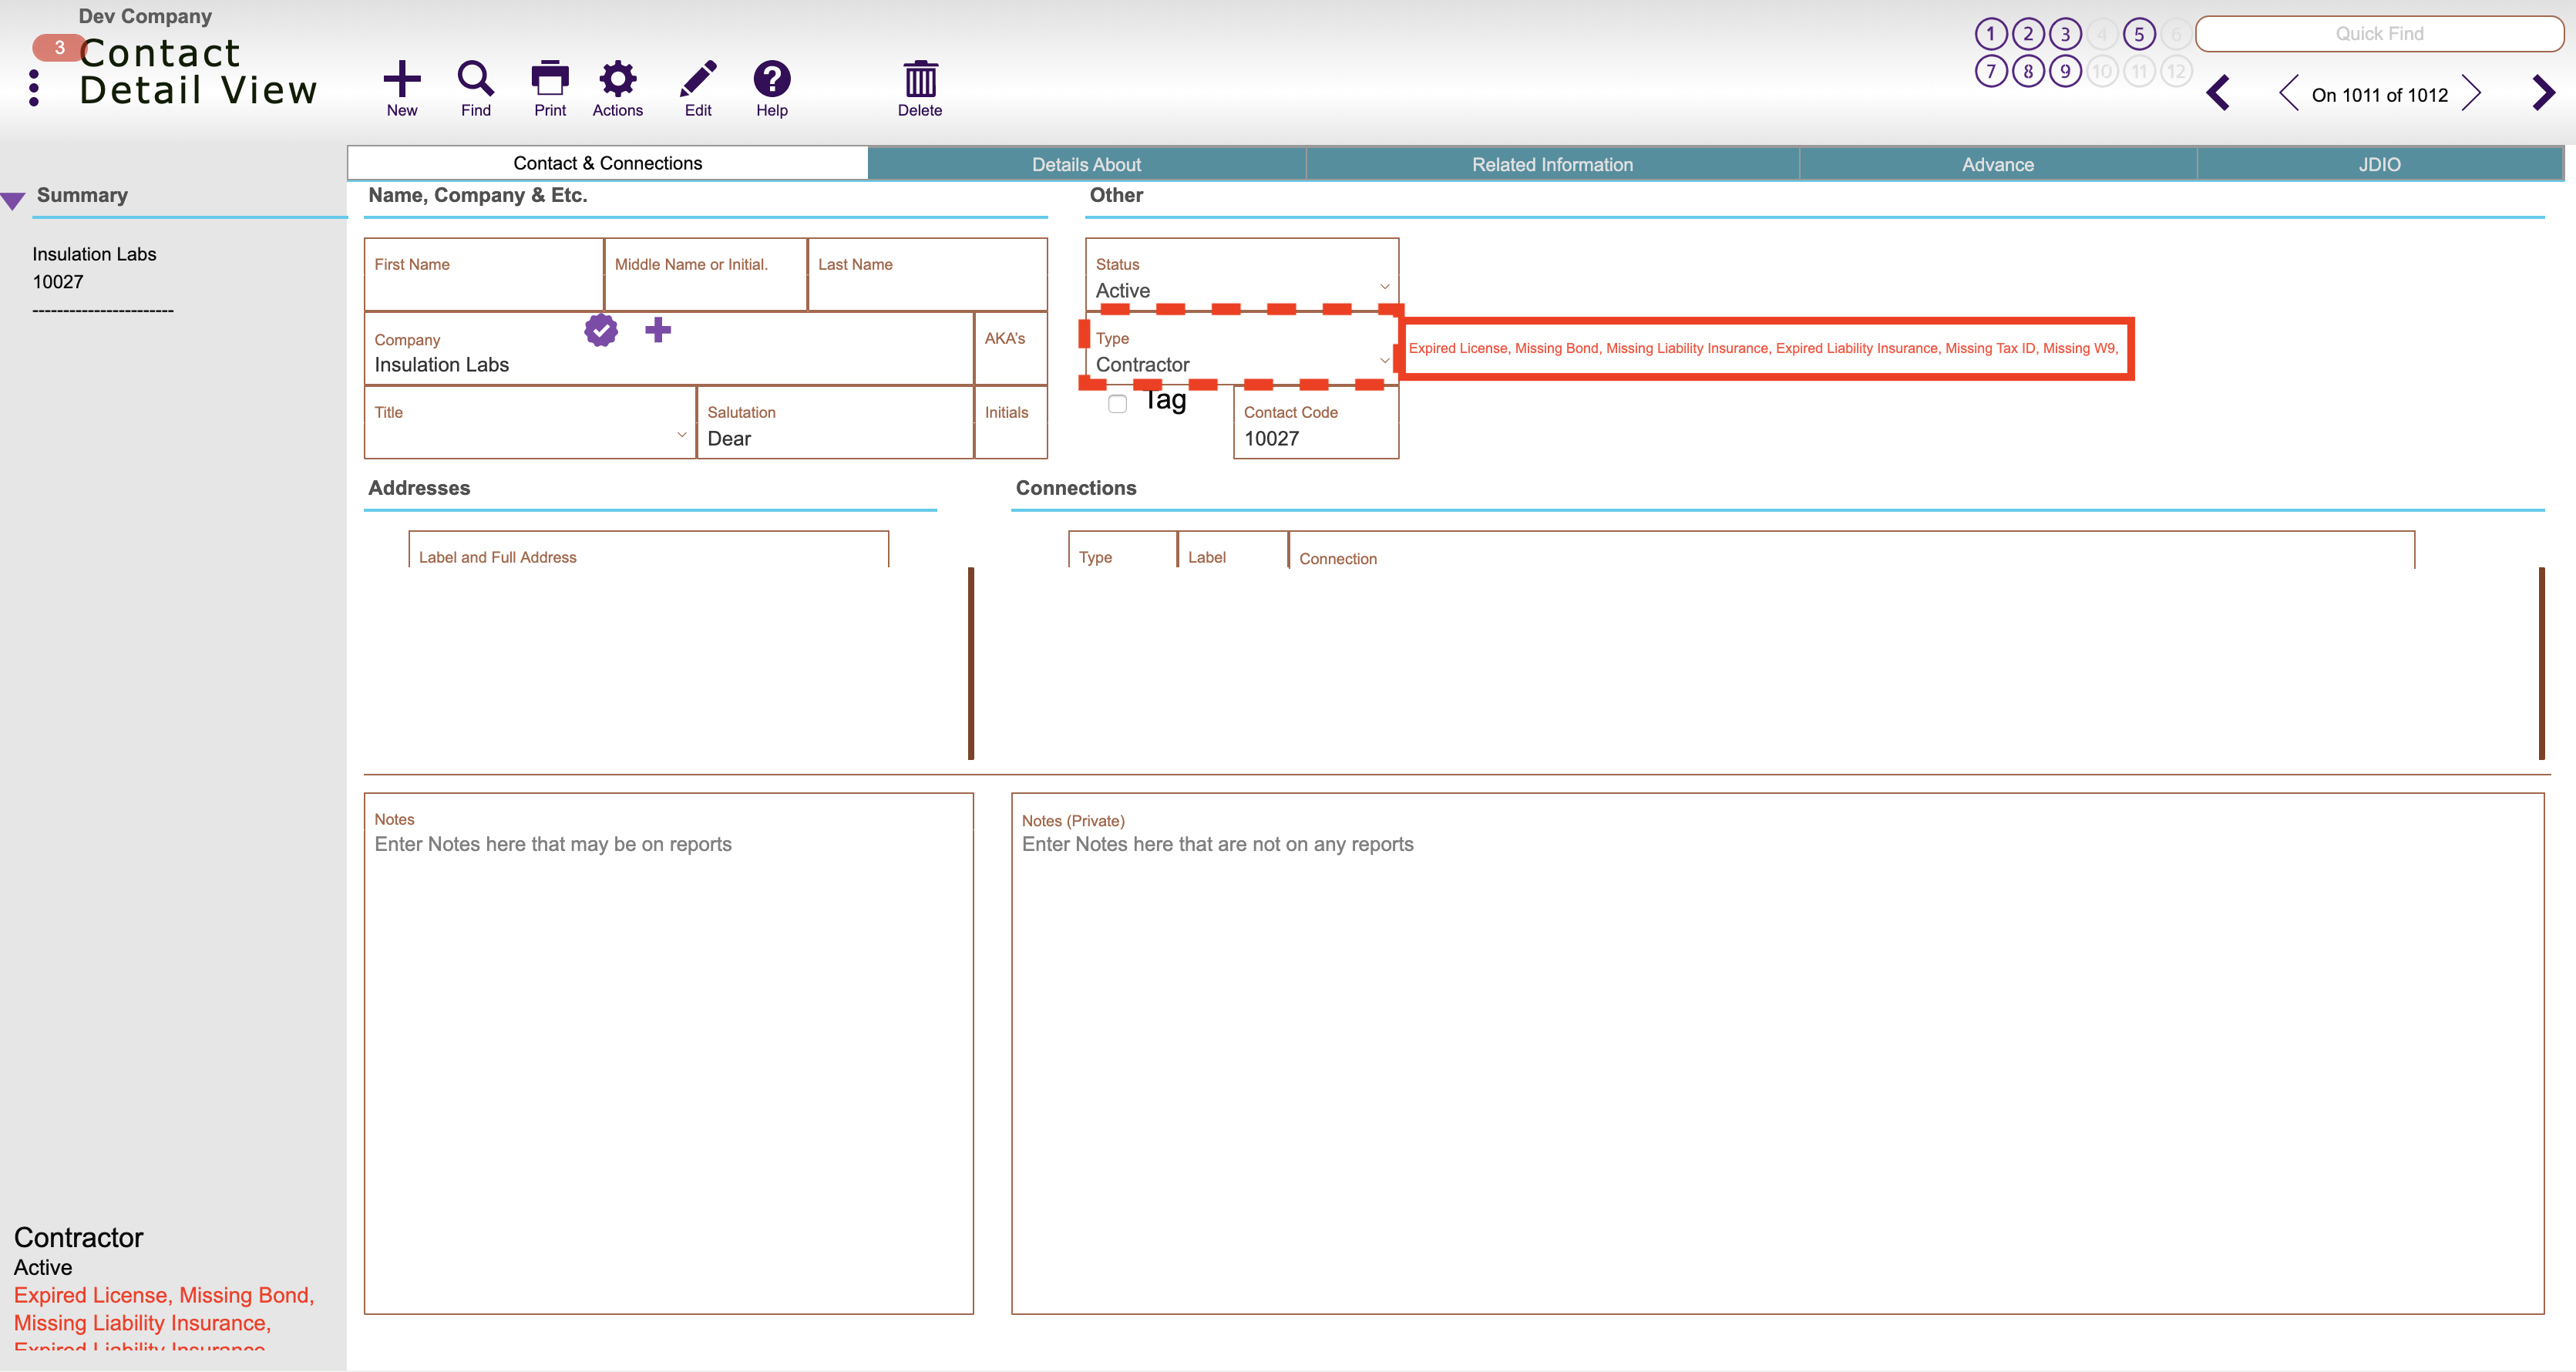
This goes over the company setups for any validation based on the type of contact, they appear on the contact record itself (see below), in contacts list view (second picture), and on a voucher/draw if the contact is the main vendor (see third picture below.)


Navigate to Setups > Companies > Process tab > Contacts tab > Validation Calculations tab
You select the Contact type you want to add validations to from the left and click the Gear button to add defaults, you can delete them using the Red X.
Clicking the Edit button is where you can change the formula for the validation
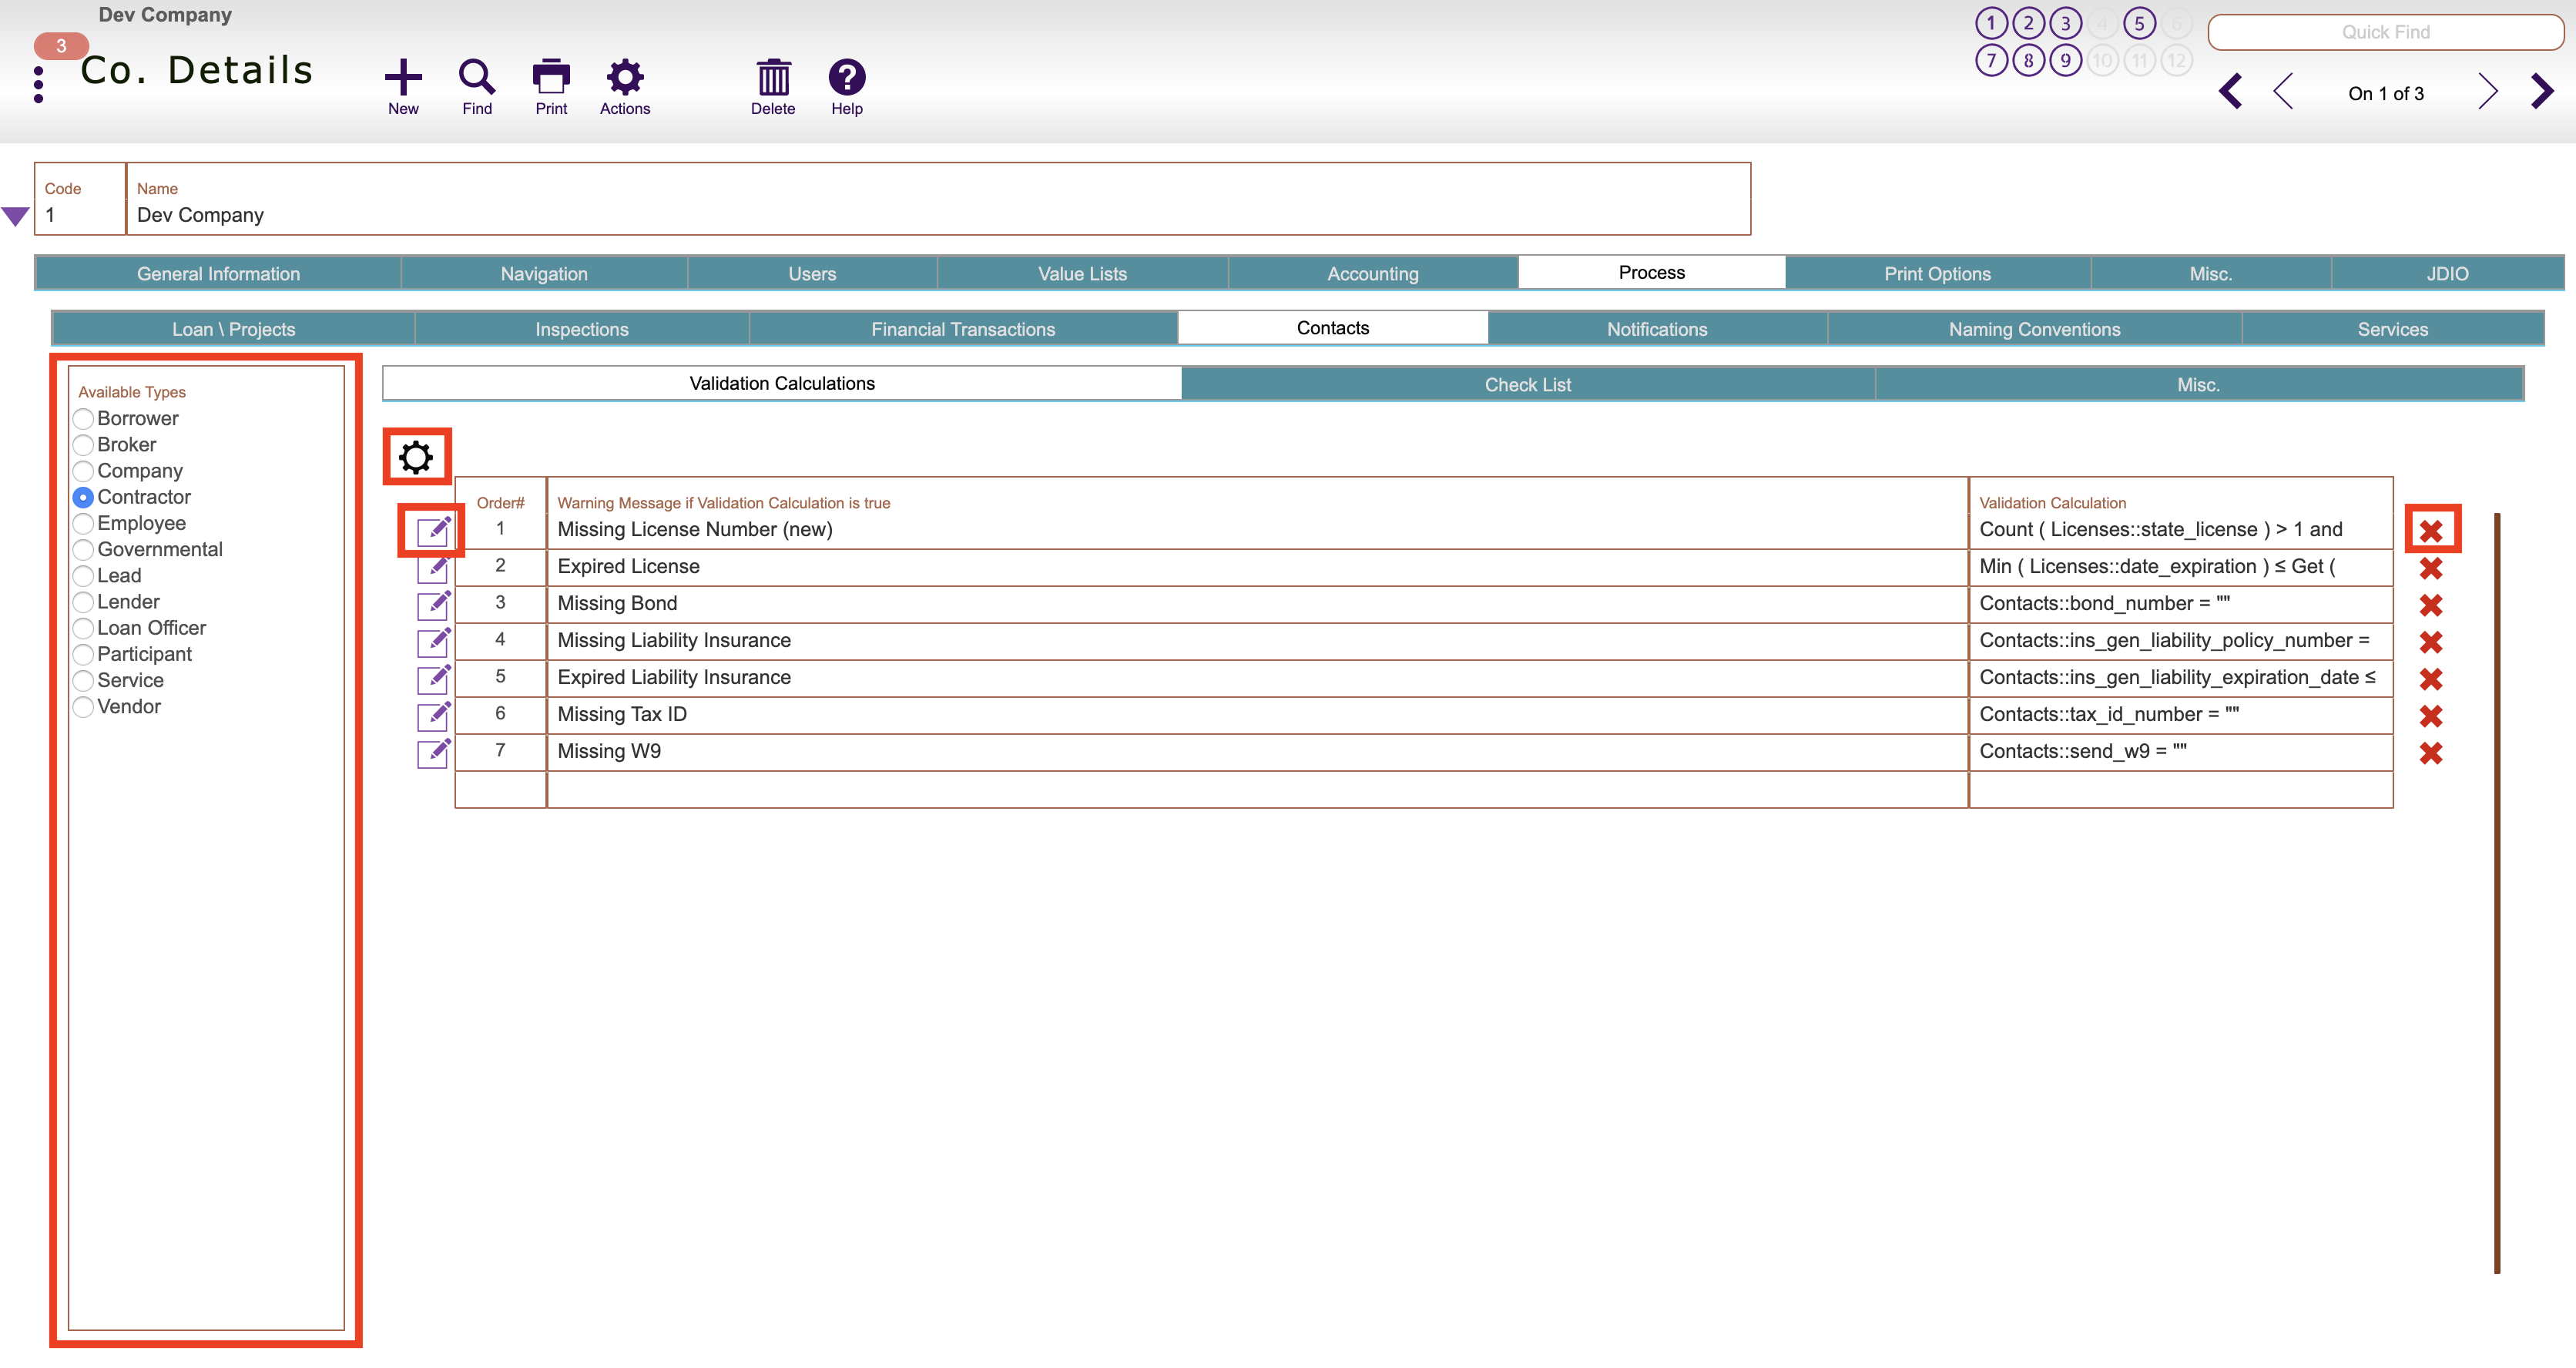
Once in the detailed Edit view for a validation you can change the message the appears if the formula fails at the top, or the actual formula itself in the Formula section

Here are some sample formulas you can copy and paste if you want to create your own:
- Missing License Number:
- Count ( Licenses::state_license ) > 1 and Count ( Licenses::state_license ) = Count ( Licenses::license_number )
- Expired License:
- Min ( Licenses::date_expiration ) ≤ Get ( CurrentDate ) 1 Dev Company 1 Missing License
- Missing Bond:
- Contacts::bond_number = “”
- Expired Liability Insurance:
- Contacts::ins_gen_liability_expiration_date ≤ Get ( CurrentDate ) and Contacts::ins_gen_liability_policy_number ≠ “Exempt”
- Missing Tax ID:
- Contacts::tax_id_number = “”
Any of these can also be modified, all you have to do is change the field name that is being referenced in the calculation.